Typically, inspecting welds is a visual task, but in particular circumstances, it may be critically important to investigate weld profiles with a more extreme level of precision.
Specific areas of interest for precise analysis include surface cracks, porosity, and unfilled craters, regardless of subsequent inspection procedures.
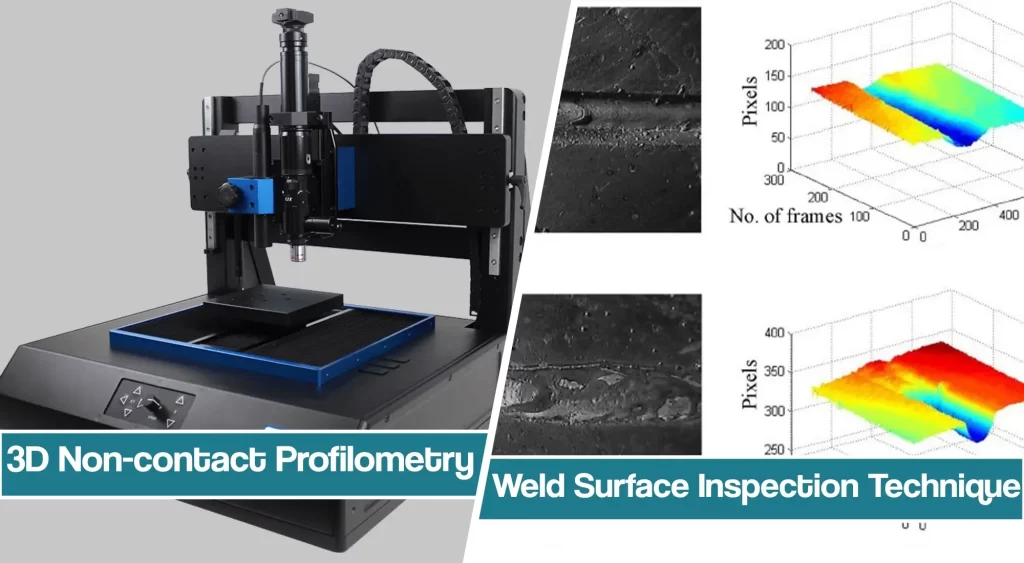
In addition, Weld characteristics such as dimension/shape, volume, roughness, size, etc., can all be measured for critical evaluation. This article will explain the role of 3D profilometry in weld surface inspection.
3D Non-Contact Profilometer Machine
Unlike other techniques, such as touch probes or interferometry, the Nanovea 3D Non-Contact Profilometer, using axial chromatism, can measure nearly any surface.
As a result, sample sizes may vary widely due to open staging, and no sample preparation is needed.
The nano- through macro-range readings are obtained during surface profile measurement with zero influence from sample reflectivity or absorption.
The Profilometer has an advanced ability to measure high surface angles. Also, there is no software manipulation of results.
It’s possible to measure any material easily: transparent, opaque, specular, diffusive, polished, rough, etc. The technique of the Non-Contact Profilometer provides an ideal, broad, and user-friendly capability to maximize weld surface studies with the benefits of combined 2D & 3D capability and portability for field studies.
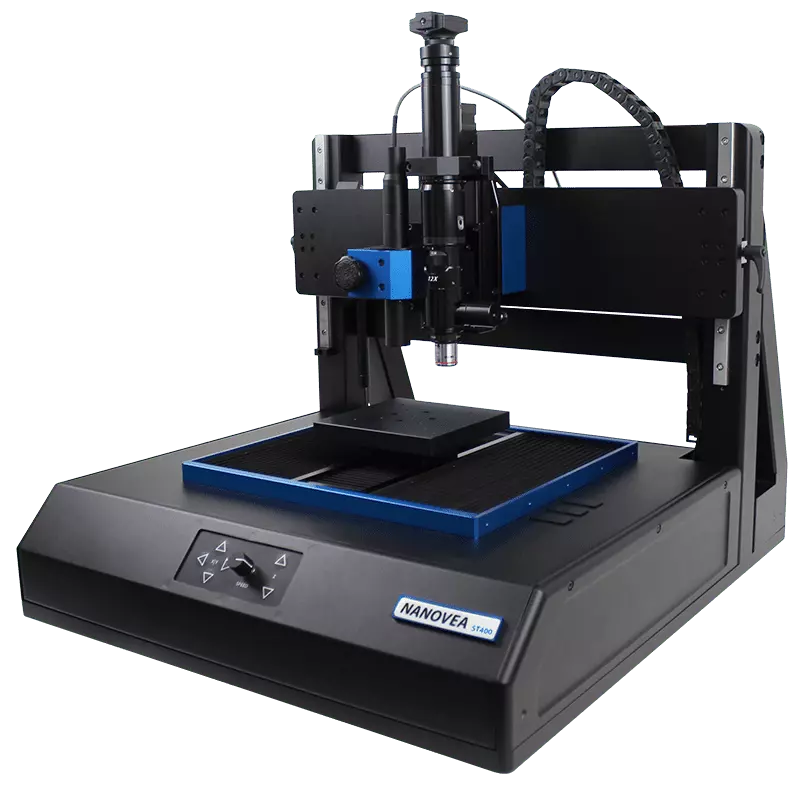
Nanovea ST400 Profilometer
In this application, the Nanovea ST400 Profilometer is used to measure the surface roughness, shape, and volume of a weld, as well as the surrounding area. This information can provide critical information to investigate the weld and weld process quality properly.
This machine utilizes advanced software that makes it easy to select zones on the screen to be scanned automatically.
In addition, QC options are available to automate all aspects of testing, including pattern recognition, database communication, macro programs, and analysis recipes.
A wide range of measurements can be obtained with a single profilometer scan. Most commonly, those are 3D waviness, roughness, step height and/or film thickness to advanced fractal analysis and microstructure/particle characterization. You can deduce how this approach and these options can be utilized in inspecting weld surfaces.
Besides welding, these machines can be used in industrial coatings scratch and wear evaluation, fractography analysis, polymer belt wear and friction, sandpaper abrasion performance, piston wear testing, and fossil microstructure.
Measurement Principle
The axial chromatism technique uses a white light source, where light passes through an objective lens with a high degree of chromatic aberration. As a result, the refractive index of the objective lens will vary concerning the wavelength of the light. In effect, each wavelength of the incident white light will re-focus at a different distance from the lens (various heights).
When the measured sample is within the range of possible heights, a single monochromatic point will be focalized to form the image.
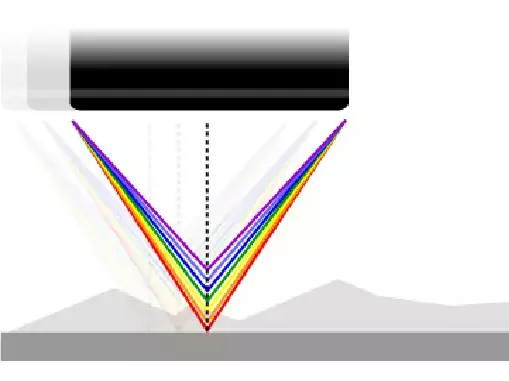
Due to the confocal configuration of the system, only the focused wavelength will pass through the spatial filter with high efficiency, thus causing all other wavelengths to be out of focus. The spectral analysis is done using a diffraction grating.
This technique deviates each wavelength at a different position, intercepting a line of a charge-coupled device (CCD), which in turn indicates the position of the maximum intensity and allows direct correspondence to the Z height position.
White-Light Axial Chromatism
Unlike the errors caused by probe contact or the manipulative Interferometry technique, White-Light Axial Chromatism technology measures height directly by detecting the wavelength that hits the surface of the sample in focus. It is a direct measurement with no mathematical software manipulation.
This provides unmatched accuracy on the surface being measured because a data point is measured accurately without software interpretation — or it is not measured at all.
The software completes the unmeasured point, but the user is fully aware of it and can have confidence that there are no hidden artifacts created by software guessing. Nanovea optical pens have zero influence from sample reflectivity or absorption.
Variations require no sample preparation and have an advanced ability to measure high surface angles. They are capable of large Z measurement ranges. It’s possible to measure any material: transparent/opaque, specular/diffusive, polished/rough.
The results of 3D Profilometry in Weld Surface Inspection
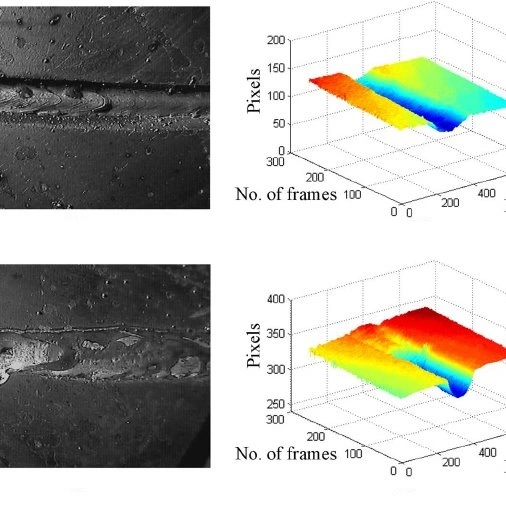
The result of profilometry presents the full 3D view of the weld and the surrounding area, along with the surface parameters of the weld only.
Separately, a 2D cross-section profile can be shown.
With the cross-section removed from the 3D view, the dimensional information of the weld is calculated, and the surface area and volume of material calculated for the weld only also are shown.
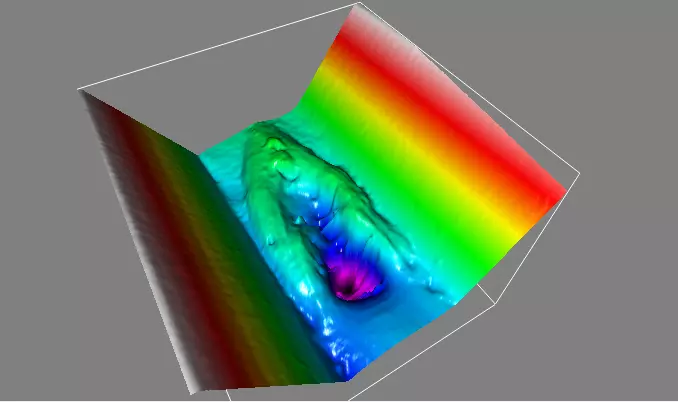
In this application, we have shown how the Nanovea 3D Non-contact Profilometer can precisely characterize the critical characteristics of a weld and the surrounding surface area. From the roughness, dimensions, and volume, a quantitative method for quality and repeatability can be determined and or further investigated. Sample welds, such as the example in this note, can be analyzed quickly, along with AFM, with the standard tabletop Nanovea Profilometer, or a portable option is available for immovable and or field application study.
Nanovea’s instruments can be found in renowned educational and industrial organizations worldwide. In addition, clients at the forefront of the most demanding industries rely on instruments’ unmatched accuracy and technical superiority.
Final Thoughts
Compared to the conventional abrasion measurements, the Nanovea Mechanical Tester and Tribometer are excellent tools for evaluating and quality control the commercial floor and automotive coatings. While in scratch mode, these machines can detect adhesion/cohesion problems in a coating system.
The NANOVEA Tribometer provides a well-controlled quantifiable, and repeatable tribological analysis of the wear resistance and coefficient of friction. Specific areas of interest for detailed research in welding include surface cracks, porosity, and unfilled craters, regardless of subsequent inspection procedures.


