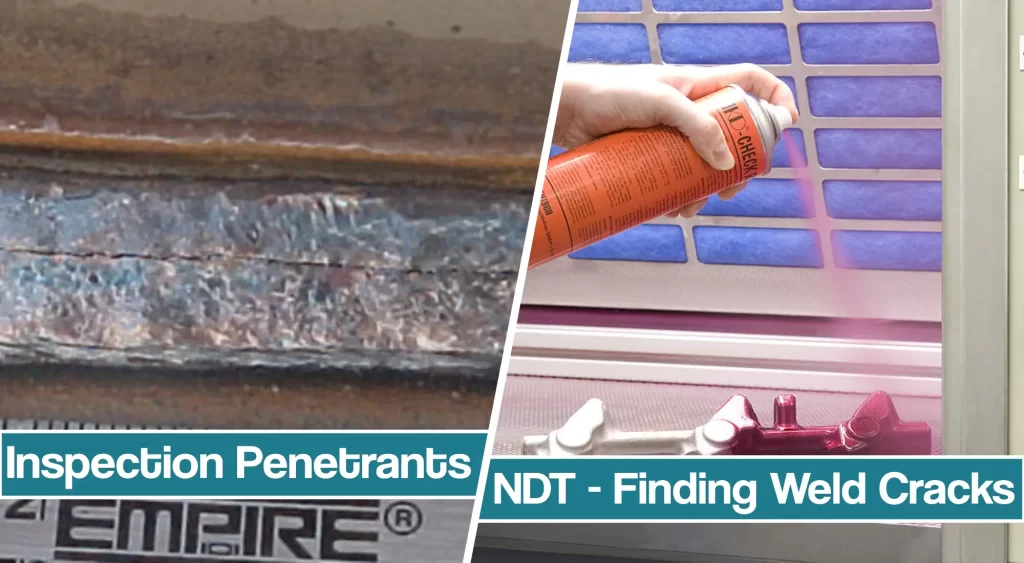
Penetrant inspection is a simple and effective method for locating surface cracks and flaws in the field after welding. In addition, this is one of the most popular Nondestructive Examination (NDE) methods in the industry.
Inspection penetrants enter fine cracks in the base metal or the welded bit, and dye makes the cracks visible. Thus, liquid penetrant inspection stands out as a pretty straightforward inspection method.
So if you wonder how inspection penetrants were developed, how they work, and how you use them, you are in the right place.
How Were Inspection Penetrants Discovered?
The first documented use of inspection penetrants was in the railroad industry. First, the maintenance crew found that used engine oil placed on a rail readily entered surface cracks. Next, they waited a bit, then thoroughly cleaned all excess oil from the rail. Finally, rails were coated with powder chalk or suspension of chalk in alcohol. Once the wheels were dry, any oil stored in the flaw would bleed out into the chalk and be detected.
The idea was widely accepted, so improvements and further research were made. The improvements included modifications to the oil carrier and the addition of dyes to the oil, so flaws were easier to see.
Inspection Penetrants Today
Today, inspection penetrants are widely recognized and used. However, over the years, several different names figure. For example, the American Society for Nondestructive Testing (ASNT) uses the term liquid penetrant testing (PT).
Likewise, the American Society of Mechanical Engineers Boiler and Pressure Vessel Code (ASME B & PVC) and the National Board Inspection Code (NBIC) use the name liquid penetrant examination.
Regardless of the name, the PT varies by type of penetrant and method of cleaning before applying a developer. There are two types of penetrants: fluorescent or color contrast (dye). In addition, three cleaning methods are available – water washable, post-emulsifying, and solvent removable.
Even though options vary, the most common choice is color contrast and solvent removable inspection penetrant.
How To Use Inspection Penetrants
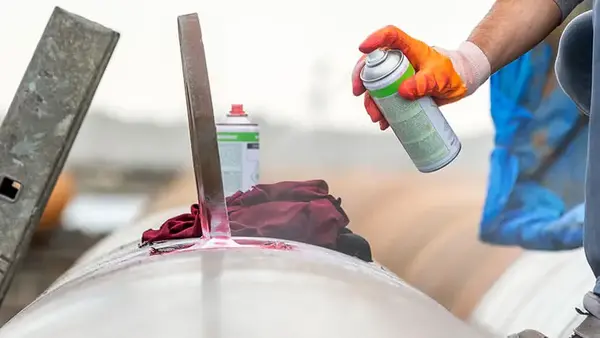
So now that you learned how the inspection penetrants were developed and the types, it is time to explain how you actually use them. As we noted initially, PT usually comes in three different cans.
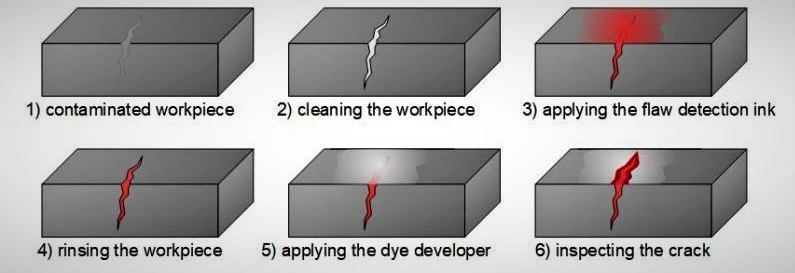
Firstly, you will need to pre-clean the part you are about to inspect. Remember that the surface needs to be free of dirt, rust, scale, paint, oil, and grease. In addition, the surface must be smooth enough to wipe off the penetrant without leaving residue. So, once the surface is clean, you will need to wipe it with a rag moistened with the cleaner/ remover.
Next, it is time to spray the penetrant. Once sprayed, it will take some time to reach the potential cracks. Manufacturers usually specify the required time, but you must wait 5-30 minutes.
After letting the penetrant puncture potential flaws, you should wipe it off. First, excess surface penetrant is removed by wiping the part with a clean, dry towel cloth. Next, you should wipe it with a clean cloth or towel moistened with penetrant remover.
Finally, you should apply the developer by spraying a fine coating. The developer will then dry to a fine white layer, and any potential flaws will show up as a red indicator on the white background.
This is the most common and easiest way to look for weld cracks and defects.
Where Are Inspection Penetrants Commonly Used
Some typical examples of ASME Code required examinations include:
- castings for surface defects
- weld metal build-up on plates
- removal of defects before welding repair
- plates for laminations in corner joints when one plate’s edge is exposed and not fused into the weld joint
- head spin hole plug welds
Penetrant inspection is used in factories to locate extremely fine defects in high-tech welds. For example, vessel makers ensured that none of their vessels had leaks. To detect any leaks, the manufacturers use penetrants a bit differently.
Penetrant is applied at one side, e.g., inside the vessel, and the developer is sprayed on the outside. If there are any cracks, the penetrant will travel through the wall and appear on the developer.
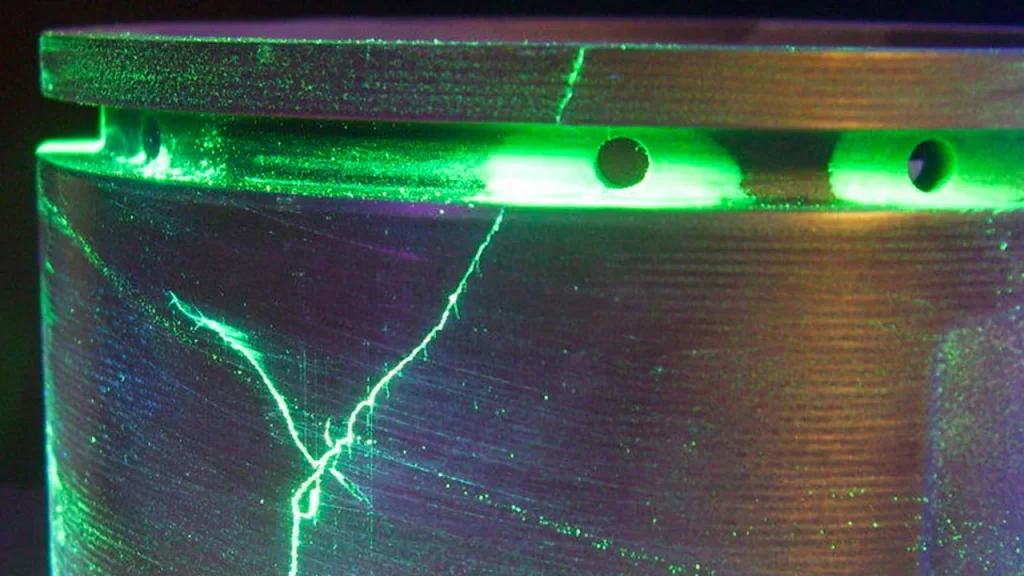
When searching for extremely small leaks, it is better to use penetrant indications fluoresce under ultraviolet light. In this case, the indications significantly stand out in a darkened area. However, this kind of inspection requires darkened rooms and UV light. Nonetheless, this kind of examination is the most precise, and it will help designers eliminate even the tiniest cracks.
What Should You Do With Detected Cracks after welding?
The final question that emerges is what to do when the inspection penetrants detect the crack? To answer it, we must first explain the characteristics of the penetrants.
The most significant advantage of the penetrants is their design. They are designed to penetrate even the tiniest cracks. However, penetrant can be nearly impossible to remove once it gets there.
Thus, trapped penetrant will cause defects in welds if further welding is done. In addition, penetrant might bleed out over time and contaminate paint and process fluids.
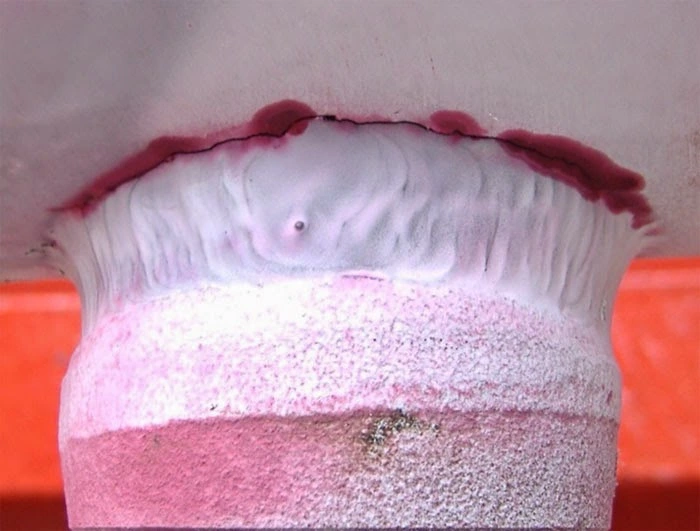
However, since the inspection allows you to determine the size, shape, and depth of the defects, you should be able to remove all cracks. If the removal is impossible, the best practice is to start over. Section V states two groups – non-rejectable and rejectable indications in the ASME Boiler and Pressure Vessel Code. As a minimum, the type of indications (linear or rounded), location, and extent (length or diameter or aligned) shall be recorded.
Advantages and Drawbacks of Liquid Penetrant Examination
As with every method, the liquid penetrant examination has its good and bad sides.
Advantages
- Ability to detect small surface discontinuities
- Quick and inexpensive inspection of large areas
- It can be used to inspect irregular and complex shape parts
- You can inspect metallic and nonmetallic, magnetic and nonmagnetic, and conductive and non-conductive materials
- A visual and distinguishing representation of the flaw is indicated on the part surface
- Easy to master, no prior training is required
- You can determine the size, shape, and depth of the crack or irregularity
- You can buy inspection kits in nearly all welding shops
- You can detect even the most delicate cracks with UV penetrants
Disadvantages
- Only open to the surface cracks can be detected
- You cannot inspect materials with porous surfaces
- Rust, dirt, paint, oil, and grease must be removed prior to inspection
- It may be necessary to grind surfaces before PT
- Post cleaning of parts and material is required
- Roughness can affect examination sensitivity
- Fumes can be hazardous and flammable
- You should be careful when cleaning and disposing of chemicals
- Trapped penetrant can cause defects in further welds
Final Thoughts
With all being said, we can deduce liquid penetrants are pretty respectable but not a perfect inspection method. You cannot use them in every possible application, but they are more than affordable and easy to use in specific inspections.
Therefore, with quick, low-cost examinations in any location, PT is often the best choice of NDE methods.
Resources:
- https://www.nationalboard.org/index.aspx?pageID=164&ID=374
- https://www.esabna.com/us/en/education/blog/surface-crack-detection-of-welds.cfm
- https://www.ndt.net/article/wcndt2012/papers/99_Broberg.pdf
- http://www.alcotec.com/us/en/education/knowledge/weldinginspection/Surface-Crack-Detection-of-Welds.cfm
- https://www.sciencedirect.com/topics/engineering/penetrant-inspection


