The best way to test your auto darkening welding helmet is to look at the sun through it. The second best is to use a lighter.
There are a few other ways as well. There are also a couple of things you should know when testing your welding helmet.
First, not every method breeds the same results and not every method is reliable. Your eyes are the most important thing to protect when welding so you must make sure that your hood will actually do that.
Improper testing can lead to arc flash. That’s because you might get an impression that everything is okay but if you don’t test properly, the auto darkening welding helmet may cause an arc flash and injure your eye.
So, let’s avoid that from happening. In the article below, you will learn the safest methods of testing your helmet and how to avoid common mistakes that lead to false results.
How to Test Your Auto-Darkening Welding Helmet
Let’s start with the best auto darkening welding helmet testing method and then proceed with others. But before we do that, we must first discuss the grind mode and the sensitivity of the helmet. No testing should be done unless you already understand these. If you do, skip the following part.
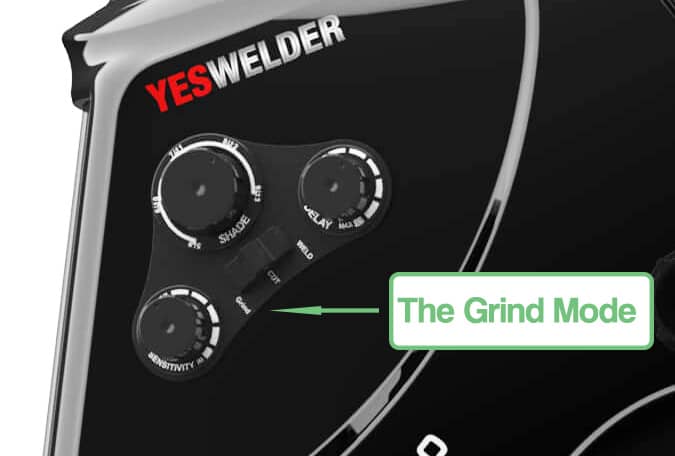
The Grind Mode
If you don’t turn off the grind mode, your tests will not be worth much.
The grind mode fixes the shade at DIN3 to 5 in most auto darkening welding helmets. There will be no auto darkening if the grind mode is on.
Your tests will have no effect so it may seem like the auto darkening feature is not working with your welding helmet.
The Sensitivity of the Auto Darkening Lens
Depending on the test method you choose below, you will need to set the sensitivity of your auto darkening helmet setting accordingly.
The sensitivity setting sets how sensitive the auto darkening helmets’ sensors are and if they are not sensitive enough for a certain amount of bright light then your lens may not darken and you could again, get a false positive sign that the auto darkening filter is not working. Now let’s proceed to the auto darkening welding helmet testing methods.
1. Sun Test – The best method
The simplest method almost always available is to look at the sun through your auto darkening welding helmet. The auto darkening helmet will fire up and increase the shade immediately.
But only if there is enough sunlight and if the sensitivity is set properly.
If the sun is not very bright you should increase the sensitivity level and it should work.
Sun emits harmful ultraviolet light just like the welding arc does. Auto darkening helmet eliminates this light by darkening the filter. But if it doesn’t work don’t despair. Instead, try some of the methods below. It could be that the sunlight is not strong enough to trigger the auto darkening filter with your welding helmet.
2. Using a Lighter to Test the Auto Darkening Welding Helmet
The second best solution is to use a regular lighter. Smokers always have one on hand so that’s an easy method but lighters are always handy to have, so it’s a good idea to have one with you at all times in the welding shop or on site.
Auto darkening welding helmet should darken immediately after you spark the lighter. It is a good idea to move the flame around, put your hand in front of the helmet, flick the lighter on and off a few times and check how the helmet’s lens reacts. Now let’s see some more methods.
3. Using a remote control for TV, AC or anything else that uses IR blast
Almost all remote controls use an infrared signal to transmit to their devices. This IR signal can trigger the auto-darkening welding helmet to go dark like welding infrared radiation. To utilize the IR remote, you should point it toward the hood and press any button. The remote will send an infrared signal and the auto-darkening helmets’ sensors will pick it up.
However, this method is not very reliable because the IR signal is usually weak, which means that you must set your auto-darkening welding helmet to the maximum sensitivity.
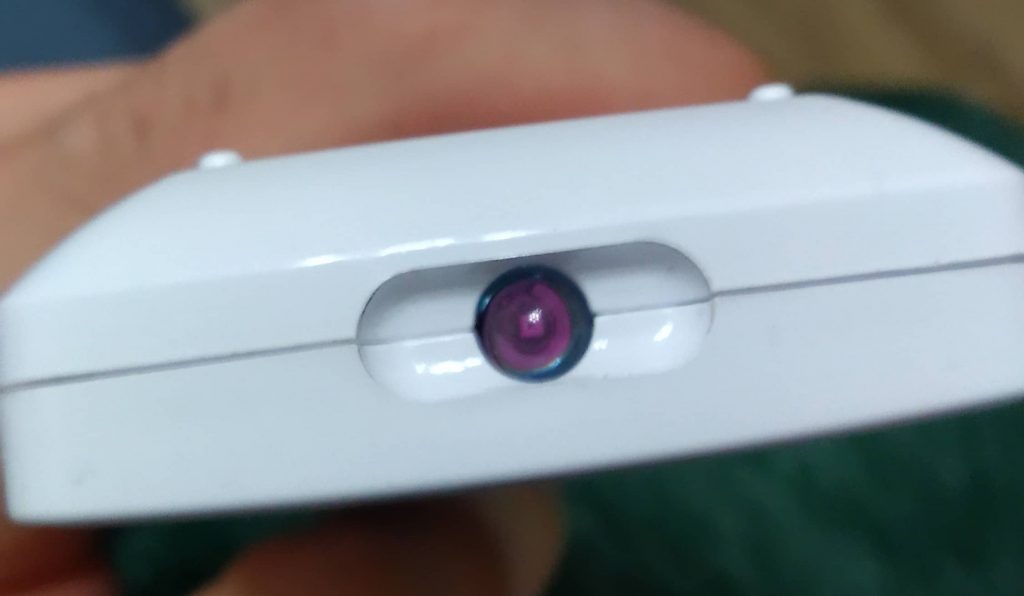
This doesn’t mean that it will work when you set it to normal sensitivity levels and you could get flashed.
Plus, these remote controls may use pulsed signals which would cause your welding helmets sensors to fire up and turn off the auto-darkening filter rapidly. This could leave you wondering if the helmet is broken or the IR remote uses a pulsed signal.
If that happens, then the test didn’t really provide a reliable result. The third thing that could happen is that the helmet simply doesn’t react to the signal because the signal is too weak. You should check the batteries on the remote but if the helmet is still non-responsive it could be dead or the IR radiation could simply be too weak. So don’t be throwing away your hood yet.
4. Looking at the light source
Another awesome way to test your auto-darkening welding helmet is to look directly at the light source. It is best to look at a very bright fluorescent light.
The kind that is usually found in your welding shop like your typical bright overhead lights. A good helmet will dim as soon as you point it at the light. You should also check sensitivity settings.
Many people welding indoors have to find an optimal sensitivity setting that doesn’t trigger the helmet auto-darkening shade from the surrounding lights while still working with the welding arc.
What else should you check
Besides the auto-darkening filter ensure that other features of the welding helmet are fully functional. The ADF is essential but the welding helmets are complex and if one element fails then you have a faulty helmet on your hands.
The power
A solar powered welding helmet will use radiation as a source of energy but there are also welding helmets that use replaceable batteries. Modern welding helmets can also use a combination of the two.
Additionally, some helmets don’t use any power or auto-darkening at all like the passive helmets. You should also know that some helmets use nonreplaceable batteries and before you begin welding you should definitely check their reaction to intense light.
Safety standards
Your welding equipment must meet all industry standards and auto-darkening helmets or passive welding helmets are not an exception. In addition, they need to stop harmful ultraviolet light and IR light, be impact resistant and endure high temperatures. To be safe on your welding job, the helmet must meet the ANSI Z87.1-2003 standards.
The lens reaction time
For your welding helmet to prevent harmful ultraviolet rays from causing damage, the lens reaction needs to be fast. This is the time that is needed for the lens to switch dark. A quality helmet switches with the reaction speed that allows you to not see the welding arc in its full intense heat not even for a brief moment.
Conclusion
The sun test is your best bet, the cigarette lighter method is also an excellent method and so is looking directly at the light source. The TV remote method, however, can get a bit tricky so be careful with that one. The auto darkening helmet costs more than a passive welding helmet so you should definitely get a good one.
Still, testing it prior to getting to laying those beads is always a good idea. You should always check if you are good with the welding helmet’s delay time, are auto darkening sensors working and if they adjust lenses immediately.


