Defects in welding can cause significant damage to weld metals, leading to loss of strength and durability and even costly structural failures. Sometimes even the satisfying-looking weld surface can carry weld defects.
Various weld testing methods have been developed to deal with the issues. Today, we can roughly break welding inspection methods into two types: destructive testing and non-destructive testing methods.
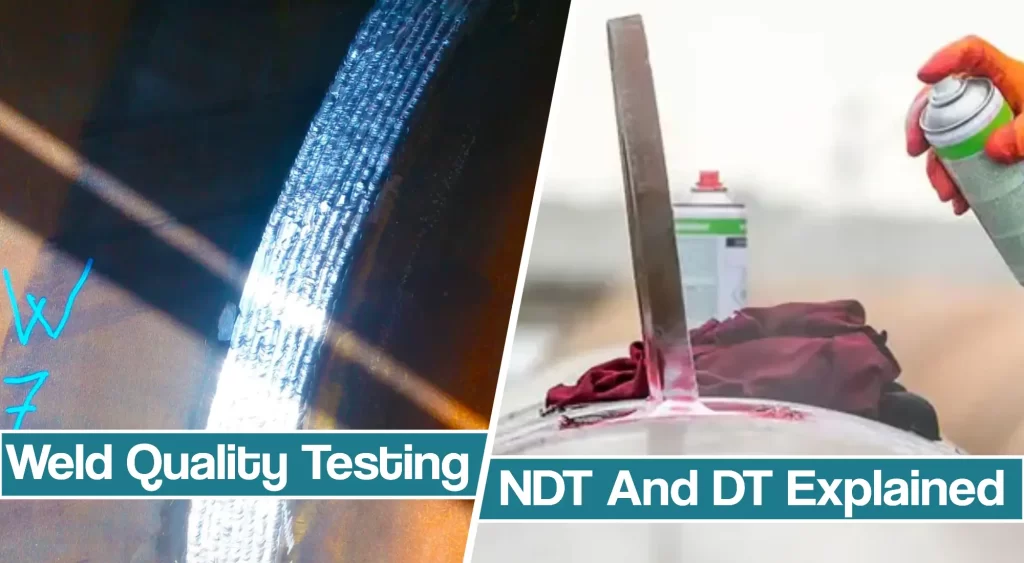
Each type has its benefits and drawbacks, so let’s take a detailed overview of weld quality testing methods.
What Are The Characteristics of High-quality weld?
Appropriate weld quality is determined prior to the welding process, and in industry, it is usually selected by the welding fabrication drawing or blueprint.
This document provides weld sizes and other welding dimensional requirements such as length and location. However, some common characteristics identify the perfect welds: even metal distribution, lack of slag, no welding discontinuities, tight and leakproof weld with high tensile strength.
Firstly, a high-quality weld should feature an even metal distribution. Lack of quality control can lead to undercutting or undersized welds.
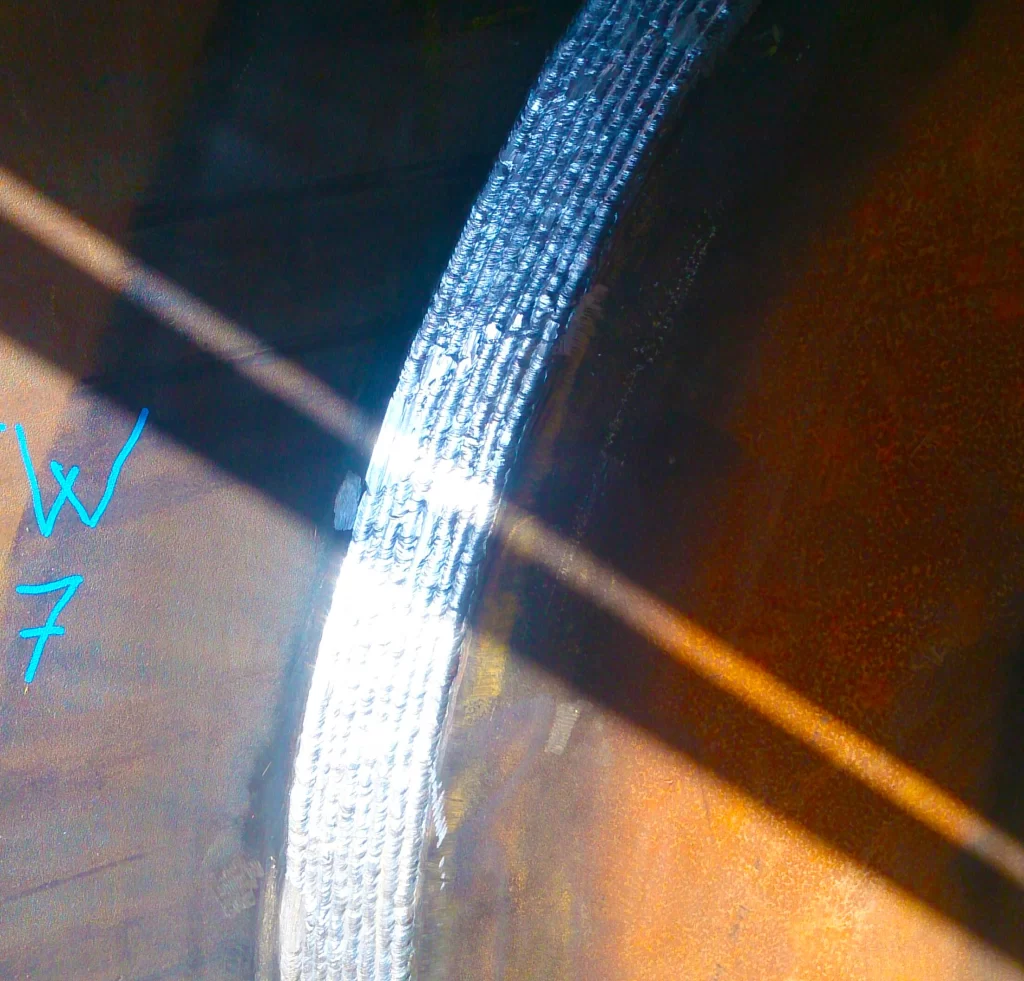
Next, a slag in a good weld should be removed easily, without any waste. Surface discontinuities such as porosity result from poor cleaning or inadequate shielding gas distribution.
Besides visual inspection methods, weld quality testing also should provide good physical characteristics. Therefore, the weld should be firm, tight, and strictly leakproof when joining pressure vessels or marine vessels.
Common Weld Defects
Before we talk about weld quality testing in fabrication processes, let’s first explain the most common weld defects and why they occur. Welders are most likely to deal with incomplete penetration, lack of fusion, undercutting, slag inclusions, and porosity.
- Incomplete penetration occurs once the filler and base metal fail to fuse at the root of the joint. This defect occurs once the joint design is not suitable for the welding process or due to construction conditions.
- Undercutting happens due to the burning of the base metal at the toe of the weld. Undercutting usually occurs once the current is too high, the arc gap is long, or the crater is not filled with weld metal.
- Lack of fusion occurs once the layers of weld metal or weld metal and base metal fail to fuse, and the metal rolls over the plate surface. This defect is also referred to as overlap, and it happens if the heat is too low due to poor fluxing and improper cleaning.
- Slag inclusions produce porosity in the welded metal, and they are generally made up of electrode coating materials or fluxes. They usually happen due to poor groove and weld preparation and a multi-pass approach when slag is not cleaned.
- Porosity is shown as small holes filled with gas, as they don’t contain any solid metal. This defect can be avoided by reducing the heat and providing adequate shielding.
Weld Testing Methods
As we mentioned at the beginning of this text, all welding inspection methods can be divided into destructive and non-destructive testing.
Destructive weld testing involves the physical destruction of the friction welded components.
Meanwhile, non-destructive weld testing evaluates the structural quality of components without damaging them.
Compared to non-destructive, destructive testing methods are generally easier to perform.

In addition, destructive testing methods provide more information that interprets results. On the other hand, nondestructive testing saves time and money in product evaluation and research.
Destructive testing methods
Destructive testing measures the physical properties of base metals and components to understand the performance of materials under certain conditions. Most commonly, destructive testing includes mechanical testing such as hardness testing and impact tests.
Destructive testing usually is performed to:
- Qualify weld performance
- Troubleshoot using failure analysis
- Research inspection processes to improve or validate current testing methods
By using various methods, testing can identify integrity issues such as depth of penetration, lack of fusion, inadequate root penetration, cracks, inclusions, or internal structure porosity.
Depending on the characteristics requiring inspection, the most common methods are Bend Tests: free bend, guided bend, longitudinal bend, transverse bend, Etch Test, Hardness Tests: Brinell hardness, Rockwell hardness, Impact Test, Nick-break Test, Tensile Test, Torque Test.
Let’s take a look at the widely used destructive testing methods in welding.
Macro Etch Testing
This testing method typically involves the removal of small samples of the welded joint. These samples are polished across their cross-section and then etched using a type of mild acid mixture.
The acid etch provides a clear visual appearance of the internal structure of the weld. Particular interest is often shown in the fusion line.
As a result, depth of penetration, lack of fusion, inadequate root penetration, internal porosity, cracking, and inclusions can be detected in the etched sample.
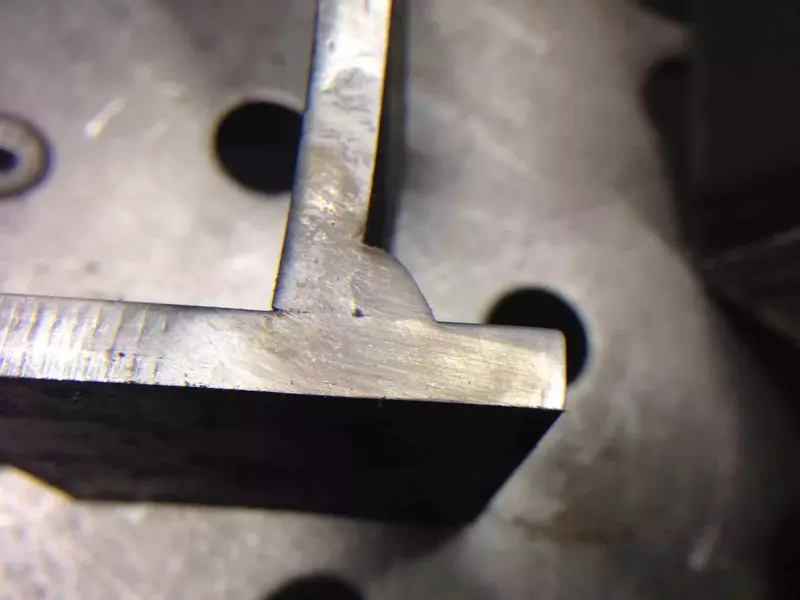
When used for failure analyses, this type of testing is often used to pinpoint welding problems such as crack initiation.
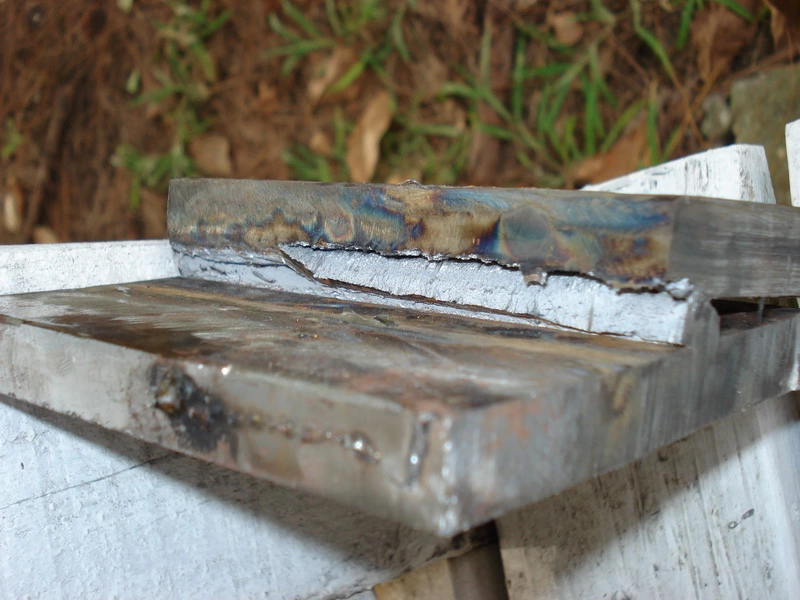
Fillet Break Weld Test
This testing involves breaking a sample fillet weld on one side only. Then, the sample has a load applied to its unwelded side, typically in a press. The load is increased until the weld fails.
This weld inspection can detect defects such as lack of fusion, internal porosity, and slag inclusions.
Fillet break weld test is commonly used combined with macro etch testing. These tests provide information on similar characteristics in different detail and ways when combined.
Transverse Tension Test
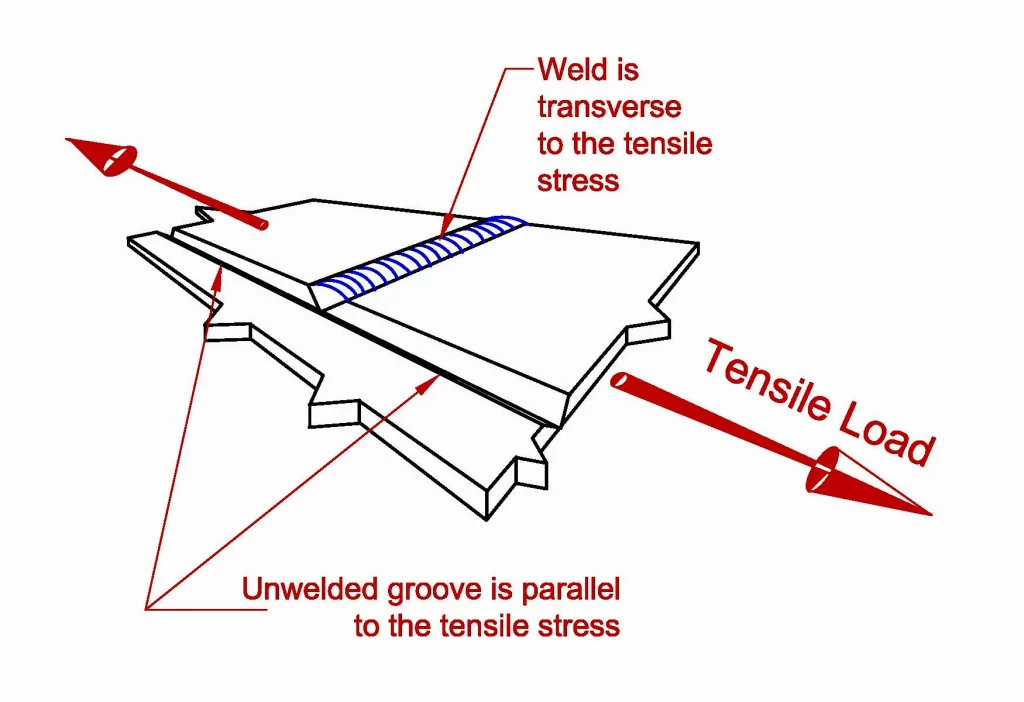
Tensile properties of the welded joint are one of the essential properties of the base metal, the weld metal, and the bond between them.
So, tensile strength is calculated by dividing the maximum load by the cross-sectional area during testing.
The testing results are shown in units of tension per cross-sectional area. This test is nearly always a part of the mechanical testing in welding procedure specifications for groove welds.
Guided Bend Test
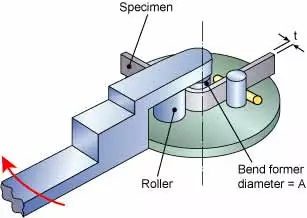
Various bend tests are used to evaluate the ductility and soundness of welded joints. However, the guided bend test is most commonly used in welding procedures and welder performance tests.
This method is good at determining liner fusion defects, which often show up on the plate surface during the testing procedure.
Non-destructive testing
The most common non-destructive tests to check welds are visual inspection, Penetrant, Magnetic Particle Inspection, Eddy Current, Ultrasonic testing, Acoustic Emission, and Radiographic testing.
However, keep in mind that the specific NDT methods’ certainty of compliance depends entirely on the inspector’s ability. Therefore, high-quality results are only obtained from trained, competent, and experienced people.
Visual inspection testing
This method uses a qualified and trained observer overviewing the weld as the welder is working. Visual inspection occurs in three phases: prior to welding, during welding, and post-welding visual inspection.
Pre-weld inspection may include evaluation and verification of documentation, material certification, and filler alloy certification. In addition, it shows welder performance qualifications and welding procedure qualifications.
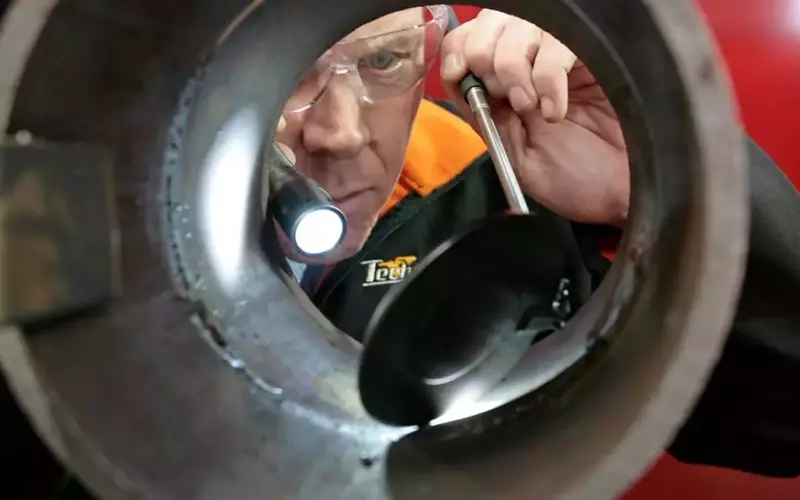
During the welding, observers inspect interpass cleaning methods, interpass temperature control, welding current settings, welding travel speed, shielding gas type, gas flow rate, etc. In addition, they can monitor environmental factors such as rain, wind, and extreme temperatures.
In the end, the inspectors verify the integrity of the completed weld. To thoroughly monitor the weld discontinuities and welding defects in arc welding, other weld testing services, and non-destructive testing methods follow the visual testing.
Magnetic Particle Testing
Magnetic particle inspection uses changes in a magnetic field to detect surface and just-below surface defects. The field distorts around the defect once a magnetic field is interrupted. Even though this method can show different discontinuities, it is only usable for ferromagnetic (iron-based magnetic) metals.
Liquid Penetrant Inspection
This method can detect surface cracks and discontinuities on the surface by using liquid penetrants. Once the surface is clean enough, the penetrants are sprayed on top of the weld. Finally, the developer is sprayed on a cleaned surface with injected penetrant to provide quality assurance.
The developer will finally draw out the penetrant dye from the cracks, resulting in color changes.
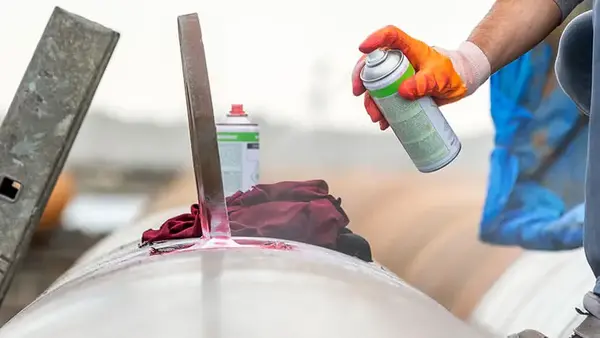
If you are interested in a detailed explanation of how penetrants work, please check our comprehensive article.
Industrial Radiography Testing
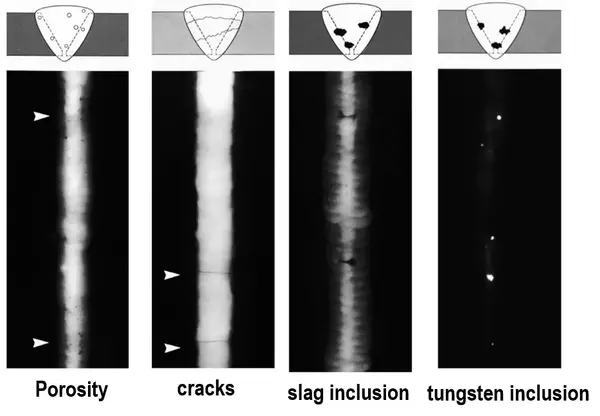
Radiographic inspection is based on radiation absorption by materials of different densities. This is an expensive method since X-rays or gamma rays are used. However, the rays penetrate almost all materials to great depths, making it easy to detect any irregularities.
To understand how radiography testing work, you should know that weld discontinuities act as density reducers allowing more radiation to pass through them. Therefore, the high level of radiation shows up as a darker color on the film.
Ultrasonic Inspection
This method uses high-frequency ultrasonic waves that are sent into metal using an emitting probe. If the waves encounter a discontinuity, they bounce off and return to the probe. The results show on a monitor, and the operator can determine the size and location.
Acoustic Emission Monitoring
Due to its speed and low cost, acoustic emission monitoring is often used on existing large structures, such as tanks and pressure vessels. By factoring in the metal’s sound velocity, the emission point can be located by triangulation, but keep in mind that the background noise can affect the results.
Conclusion
Some of these welds are placed on places that will experience extreme pressures and forces on them and its crucial for them to be properly tested many times even the welds that on the first glance seem unimportant could be potentially a heath hazard if not welded properly, and some of the welding defects like cracks can not be remedied and the work must be done all over again so proper testing is necessary.
Resources
- https://www.esabna.com/us/en/education/blog/visual-inspection-of-welded-connections.cfm
- https://www.twi-global.com/what-we-do/services-and-support/technical-support/welding-engineering/weld-testing
- https://www.thefabricator.com/tubepipejournal/article/testingmeasuring/quality-inspections
- http://www.alcotec.com/us/en/education/knowledge/weldinginspection/Destructive-Testing-of-Welds.cfm
- https://accendoreliability.com/non-destructive-testing-welds/


