Welding preparation is the critical step you must take if you want your welds to be of high quality.
Rust, oxidation layers, mill scale, slag, oils, paint, and other impurities can and will cause weld porosity, uneven penetration, brittle weld, and unexpected outcomes.
Different metals, joint types, and impurities require varying cleaning methods. Aluminum can’t be cleaned the same way as mild steel, neither can paint be removed as mill scale.
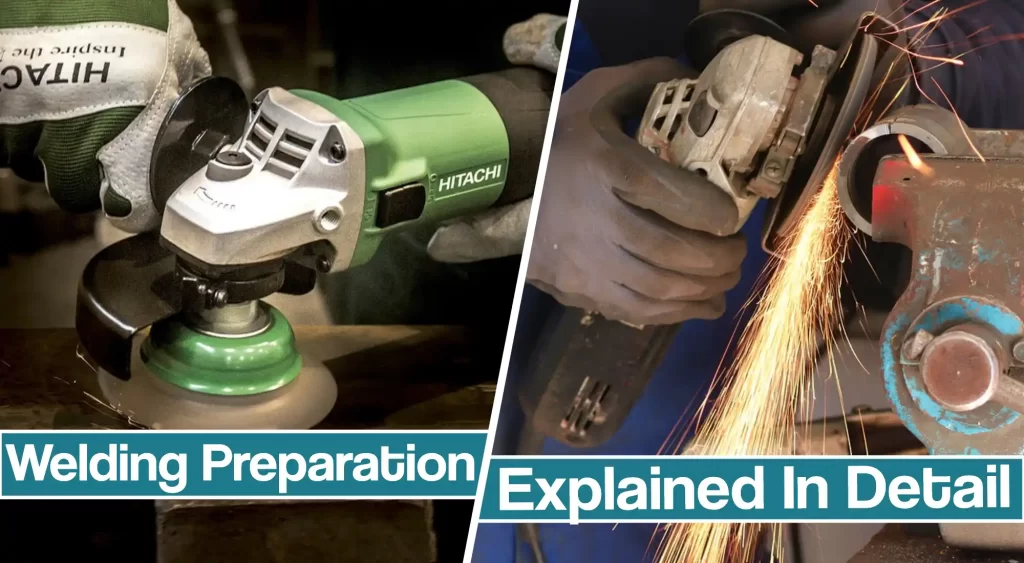
Abrasive selection plays a vital role, and so does the method of their use. A wrong abrasive on a grinding wheel can easily push the impurities deep inside the surface of the welding joint, which will burn and cause porosity due to the off-gassing of the burned impurity.
After you successfully clean the metal, you’ll have to bevel, cut, and fit. There are many ways of getting this done, and in this article, you are going to learn everything from start to finish.
how to prepare metal for welding
The preparation process begins with a planning phase and ends with metal ready for welding.
This article will take you through the entire process, from the abrasive selection to beveling your edge and getting it ready for the welding beads.
You will learn how to prepare mild steel, stainless, and aluminum. I will explain it as in-depth as I can without making this too long.
If you wish to learn about preheating the metal before welding, read our separate article. Since preheating is not always required it won’t be covered here.
Planning it out
Before you engage the weld preparation process, you need to keep the end results in mind.
That way, you’ll be able to plan the process accordingly without unnecessary delays, mistakes, and rework. Additionally, knowing in advance what needs to be done, helps in avoiding taking shortcuts when some issues arise.
When planning out the weld, you should start backward. Keep the end result in mind and plan the steps from the finish to the start.
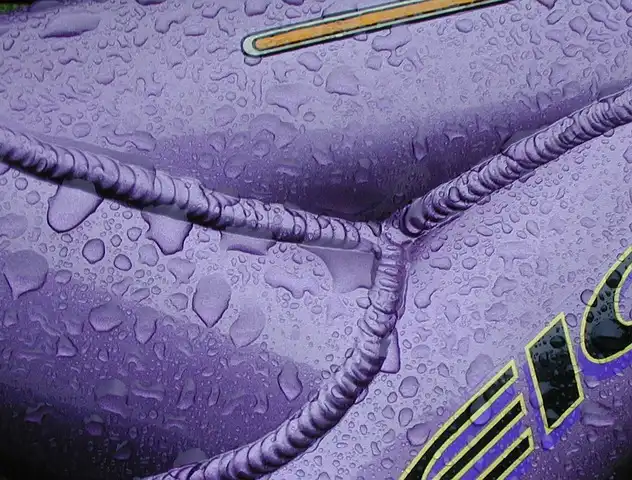
What kind of finish will the weld have? What’s the joint type? What’s the metal I am cleaning? Answering questions in that order will help you prepare everything without compromising on the result. Because you can’t make a cleaning mistake, for example, if you envisioned the end result.
Additionally, you need to consider the welding process you’ll be working with. This also plays a significant role in weld preparation and the result. Because of its high penetration and the ability to “dig the filth out” Stick welding (SMAW) with 7018 electrodes will allow you to weld less clean metal, but the end result won’t be near the aesthetic quality of a TIG welding, for example.
After you plan it out, you should obviously proceed from start to finish. First, you should clean, then cut, bevel, fit, weld, and do a post-weld cleanup.
Prepare your safety equipment, safety glasses, clean visor shield (grinding), welding helmet, gloves, welding jacket, and boots. Never work with metal without PPE, especially when grinding or welding. Even the most simple things like cleaning the metal’s surface from mill scale with a grinder can end in injuries.
Now, let’s proceed with the details.
Cleaning the metal and Abrasive types
Every metal has different impurities to clean. Some contaminants are artificial, while others are formed as oxidation layers—all of these need to be removed when preparing metal for welding.
When welding dirty metal, the impurities burn, and the resulting gasses get trapped in the weld, causing porosity.
This results in a brittle weld that will fail the x-ray tests, the force load tests, and overall, won’t get the job done. Some of these impurities won’t burn entirely, or their residue will also mix with the weld, leading to the same poor results.
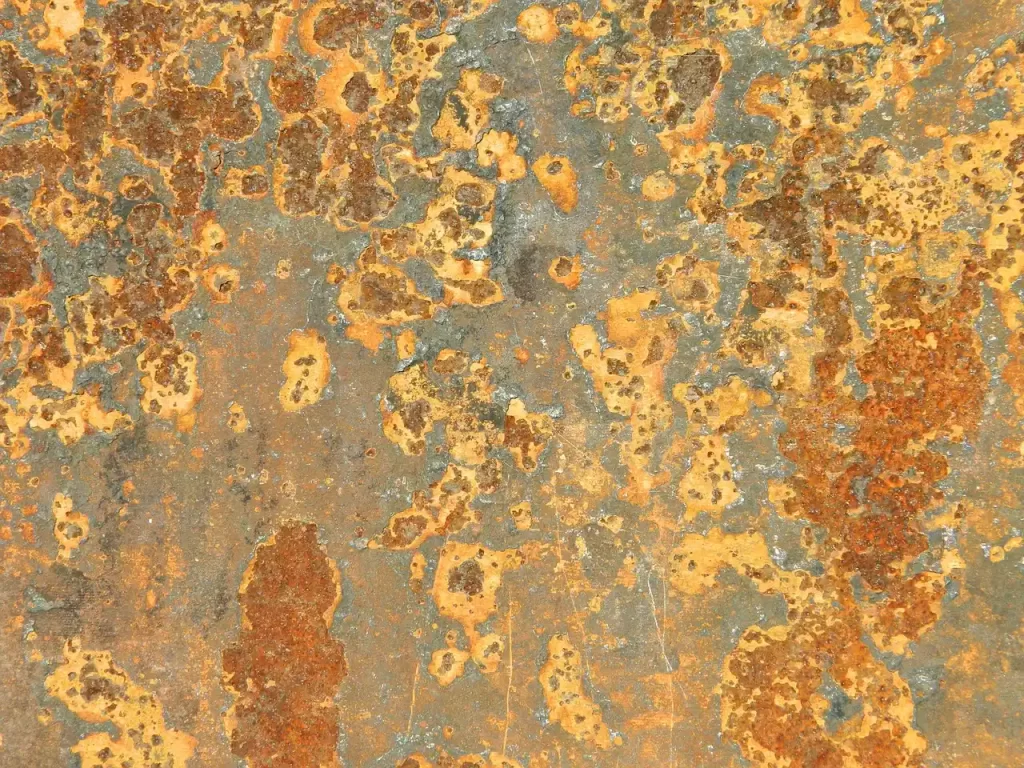
Additionally, the electric arc won’t behave as if you were welding a homogeneous mass. Different oxidation layers and other impurities have different conductivity levels than the clean base metal that you want to weld. This leads to uneven electricity flow through the metal because the internal metal resistance will not be the same as welding a completely uniform clean metal. Because if the metal is overlayed with different matter that has different voltage conducting properties, the electricity will not have a clean, consistent path.
To top that off, certain impurities have different melting points and thermal conductivity than the base metal, which can seriously hinder your metal’s weldability (take aluminum, for example).
All of these issues combined lead to a misbehaving arc, weld porosity, excessive spatter, uneven penetration, arc cutouts, weld discoloration, uneven thermal effect on the near weld area, and other weld defects.
For certain metals, even the filler metal has to be pristinely clean—namely stainless and aluminum. When cleaning the metal, you have to keep two things in mind. Abrasive selection and the metal type play the most crucial role in determining the overall cleaning process.
The most common abrasives are the:
- Grinding stones,
- Discs,
- Flap wheels,
- Cloths,
- Sandpapers,
- Different knurled brush wheels,
- Hand tools like a steel wire brush.
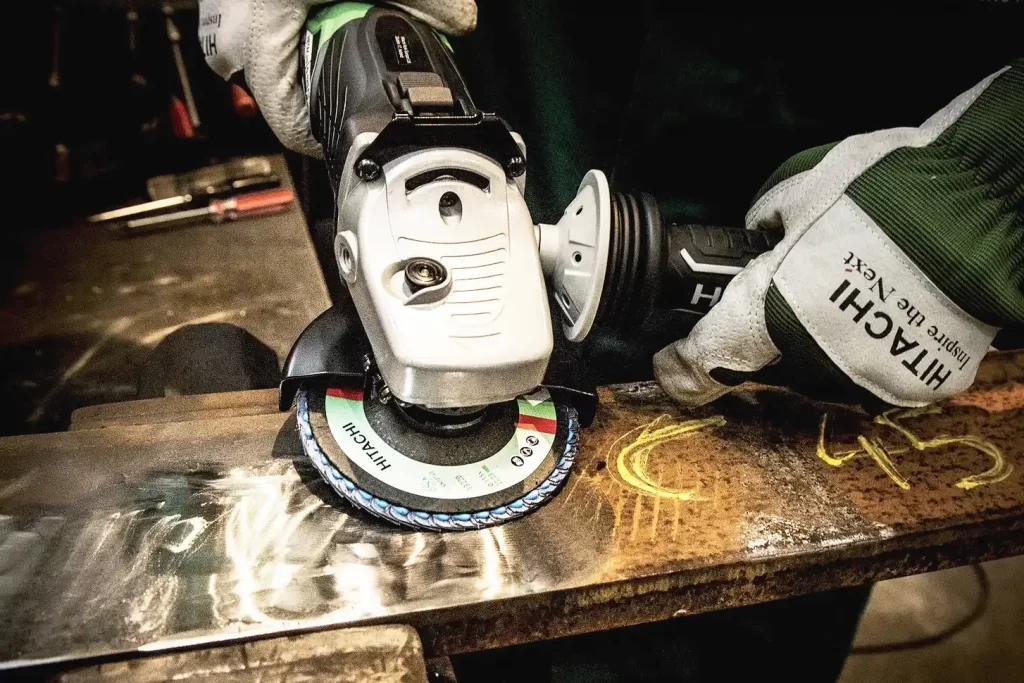
You will choose an abrasive based on the desired end finish (that’s why you start your plan with it), the metal type, what impurities you are cleaning, and the joint type you have to bevel.
Now let’s see how each metal type is cleaned, with what abrasives, and how. Afterward, I’ll specify some abrasive-related information that is often overlooked.
How to clean mild steel before welding
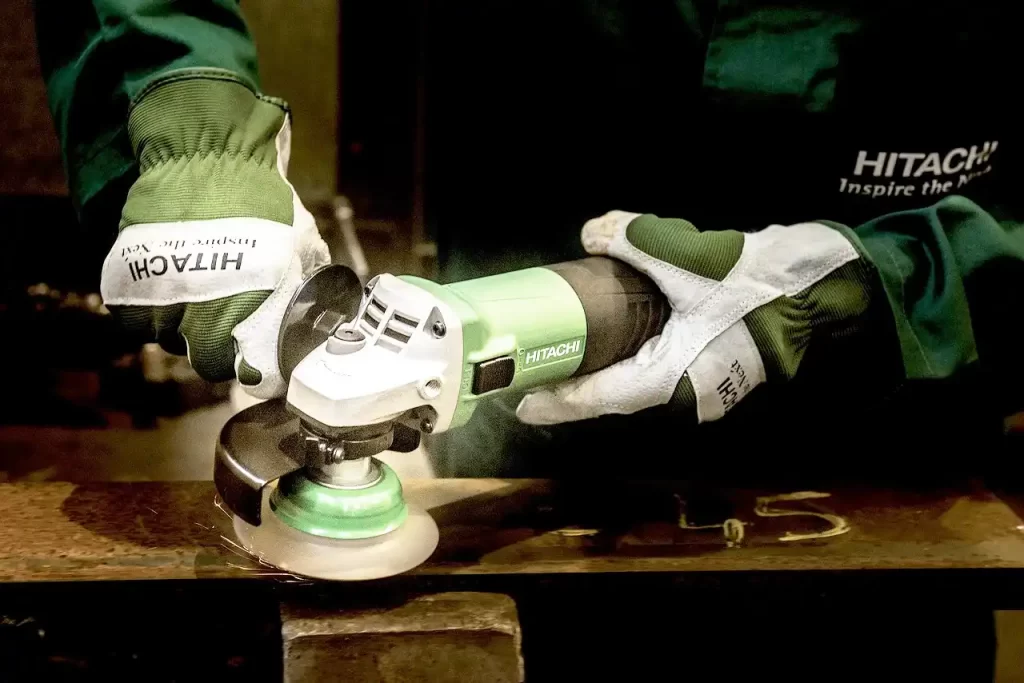
Rust, mill scale, and paint are best removed using an angle grinder with a wire wheel. The wire wheel efficiently removes impurities without eating up the metal. It’s especially useful when working with thin gauges.
However, wire bristles can fly off and cut you. These injuries can be difficult to prevent because they can fly in all directions. That’s why it’s paramount for you to wear full protective equipment.
Additionally, a wire wheel should never be spun faster than it’s designed for, it should match the angle grinder size, and be discarded when it starts showing signs of wear and tear.
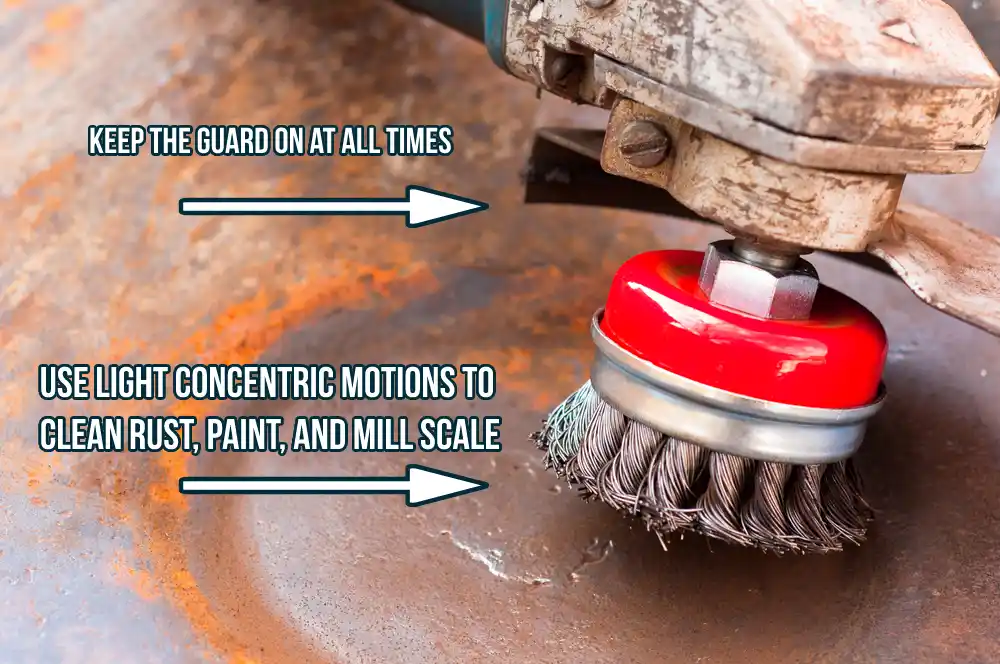
The wire wheel should be perpendicular to the piece, at 90°. Don’t confuse it with grinding wheels and apply it with shallow angles because this will lead to wire failure.
It’s also a good idea to spin the wire wheel for about a minute while pointing in the safe direction before you apply it to the metal. This allows you to inspect for unusual wheel behavior. ANSI recommends doing this as a safety measure as wire wheels can be quite unpredictable.
You can also use a grinding wheel or a flapper disc. It’s a matter of preference because both work well. However, a grinding wheel may eat up too much into the material, so you might remove more than you want to if you are not careful. However, this is good when dealing with thick impurities.
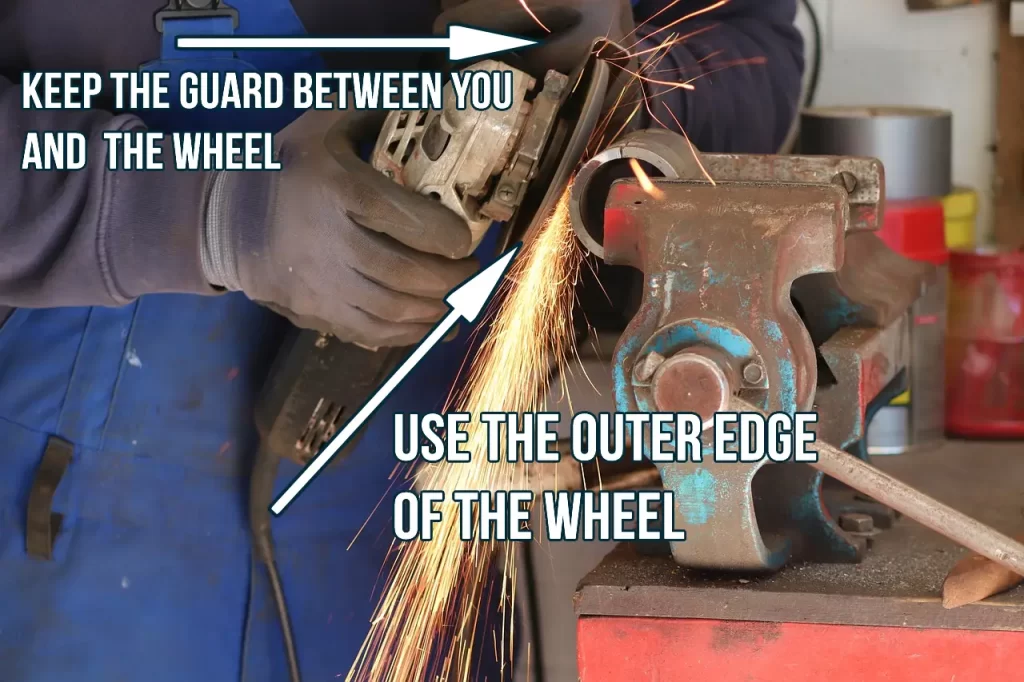
When running the grinding disc over the surface, keep the angle between 30°–45° to the work. You can use a more shallow angle to remove less surface thickness, but this will thin out the edge of the wheel. Always use a thicker wheel for grinding, not for cutting (we will cover safety soon).
Flap discs need to grind at a 10°–15° angle to put proper pressure on the metal piece. They will remove less material and create a smoother surface depending on their abrasive type and grit size. Flappers can range from grinding on the extreme end to light polishing.
For mild steel, you should choose Zirconium-aluminum oxide grain and choose a grit size suitable for your finish expectations. The grit on the low end will remove material faster and leave scratches, while the bigger grit will leave a smooth finish.
When working with either of the two, try and force the contaminant away from the piece and not into the metal by making motions in the direction where the ground off metal can easily escape.
After you’ve removed all of the rust or mill scale and got to the clean, fresh, shiny steel, you are good to go with the joint bevel operation. If you want, you can use an acetone wipe for extra cleanliness, but for most jobs, just wiping off the remaining metal dust with a rag will be fine for a good weld.
Clean stainless steel for welding
Stainless is less forgiving than mild steel and needs more care, especially if TIG welded with high aesthetic outcomes. Working with stainless requires a shift in mindset. You have to use a completely separate arsenal of tools that can’t be used again with any other metal.
Stainless steel wire brush, cutting/grinding wheels, flapper discs, vises, clamps, and other tools must be designated for stainless use only. Mark them with color and never mix them with carbon steel because they will contaminate the stainless.
Contaminants on the stainless lead to oxidation issues post-weld and can cause problems during the welding process.
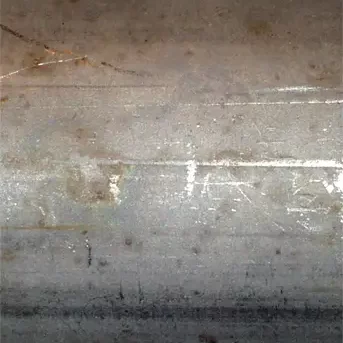
As a result, the weld bead may not be as nice. It can get porosity, contaminants can interfere with the shielding gas, dis-colorate the weld and the heat-affected zone.
Properly cleaning stainless requires the welding environment to be clean and ensuring no cross-contamination with other metals like mild steel. If you are in a welding shop, all other metalwork needs to be separate. The slightest airborne metal dust contamination can impact the end result.
When choosing the abrasive for stainless steel surface cleaning, the first step is to select something that has a heat-dissipating coating. A disc that allows the inertia-built heat to escape alongside it will not concentrate heat at the ground area.
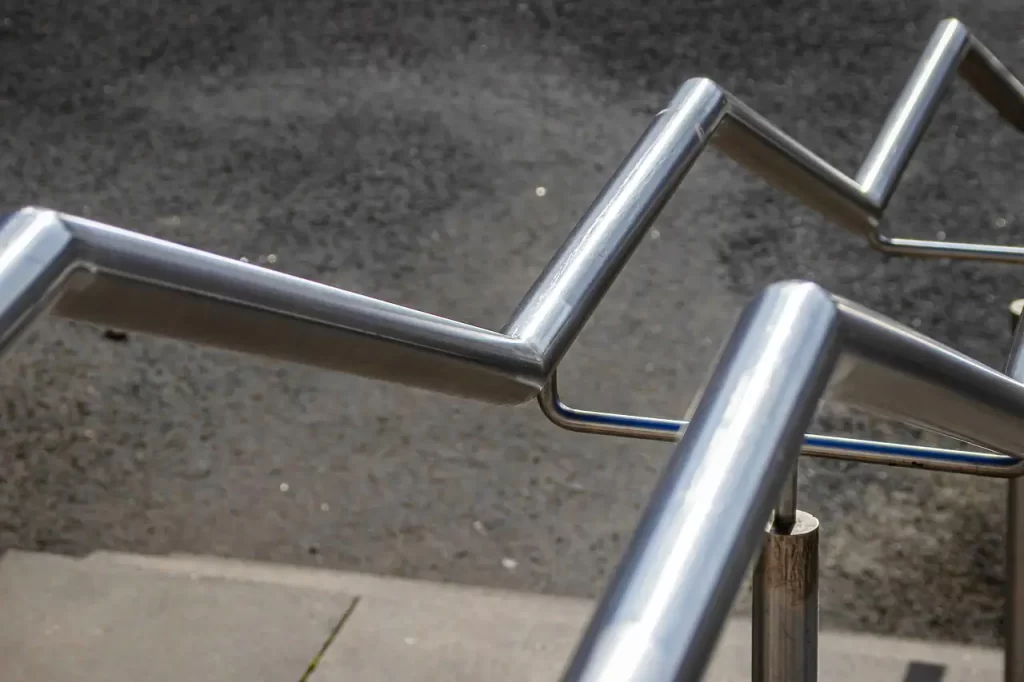
This is really important because stainless steel doesn’t tolerate heat, and any prolonged temperature increase can result in cracks that render the piece useless. This goes for welding, too but that’s an entirely different topic. We have a separate article on welding stainless steel you can read here.
Abrasive’s grit will play a significant role in the end result. Typically, with stainless, you’ll want to use finer abrasive grits because any coarse abrasive will leave deep scratches that are tough to smooth out. It’s a good idea to start with something on the medium side, like 80 grit, and quickly move up to 100+ grit levels with a very strong focus on what the end result should look like. Be extra careful not to grind out too much of the material and not to grind too big of an area that’s not affected by welding.
The finish color may also depend on the abrasive selection. For example, using silicon carbine abrasives will result in stainless getting a bluish surface because it leaves a bit deeper cuts that reflect light that way. Now you should understand why you must start from the desired end outcome in the prep metal planning phase.
When using any rotary tool with abrasives, you shouldn’t apply high pressures, and you should keep it moving around the area. Never concentrate in one spot for too long to prevent heat buildup. This can lead to discoloration and residual tensile stresses on the surface. In addition, the steel’s austenite can transform into brittle martensite due to the grinding burn.
Typical flap discs used for stainless steel are ceramic discs, otherwise known as aluminum oxide. They offer smooth grinding, long life, and most importantly, dissipate heat well.
Besides a flap disc, you can use sandpaper, and knurled wire wheels. If using wire wheels, be careful to use a stainless steel wire.
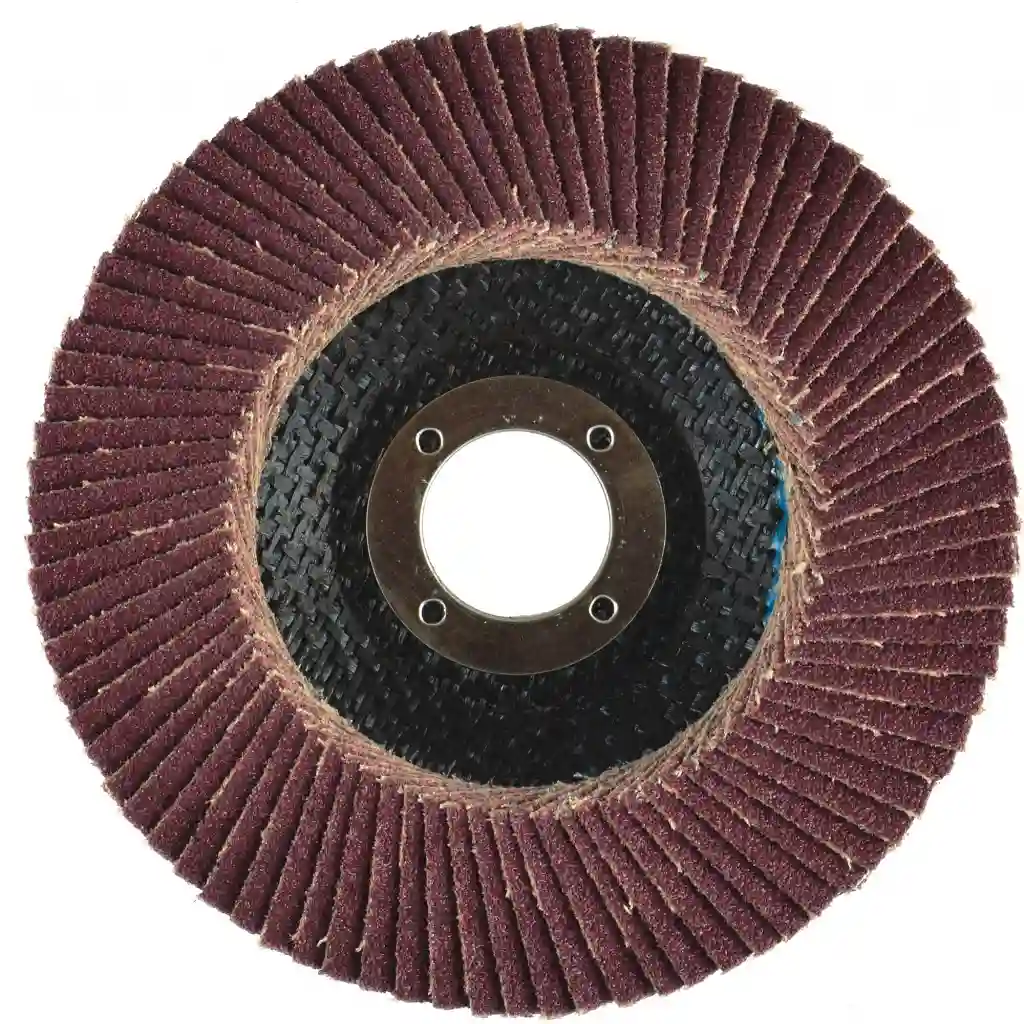
It’s best if you have a variable RPM speed angle grinder or other rotary tools. Different speeds will have different effects on stainless and high speeds typically used for cutting will not have the best outcome.
Cleaning aluminum for welding
Aluminum is probably the most complex metal to clean and weld, thanks to many of its unique properties.
It forms a naturally occurring oxide layer on its surface. This layer must be removed if you even want to think about welding aluminum. However, removing this layer first is a BIG mistake.
Aluminum needs to be cleaned from oil, grease, and dirt FIRST. Use acetone wipes before removing the oxide layer. Otherwise, the oils will penetrate the material and make it almost impossible to clean and weld.

It’s best to use dedicated acetone wipes designed for aluminum cleaning because they will be 100% free from contaminants. On the other hand, if you use the acetone solution from the bottle and a rag, make sure the rag is absolutely clean and lint-free.
After cleaning it from the oils, proceed to clean the oxide layer, but let’s start with some essential safety tips first.
Aluminum is a non-magnetic metal which means that if it goes into your eye, the ophthalmologists will have a hard time getting that piece out. So be extra careful with it. Safety glasses are not enough. If the aluminum dust and tiny particles go into your hair, they can fall off later and get into your eyes, so wear something to protect your hair as well. Aluminum pieces are tough to remove from clothes and skin, so be careful not to touch your face with your hands or wipe off the sweat with your sleeve.
Since the aluminum is so soft and has a lower melting point, grinding it with regular grinding stones is not recommended. The wheel will load up with material, make grinding useless, and increase the chance of the wheel bursting on you due to being loaded up and its temperature rising.
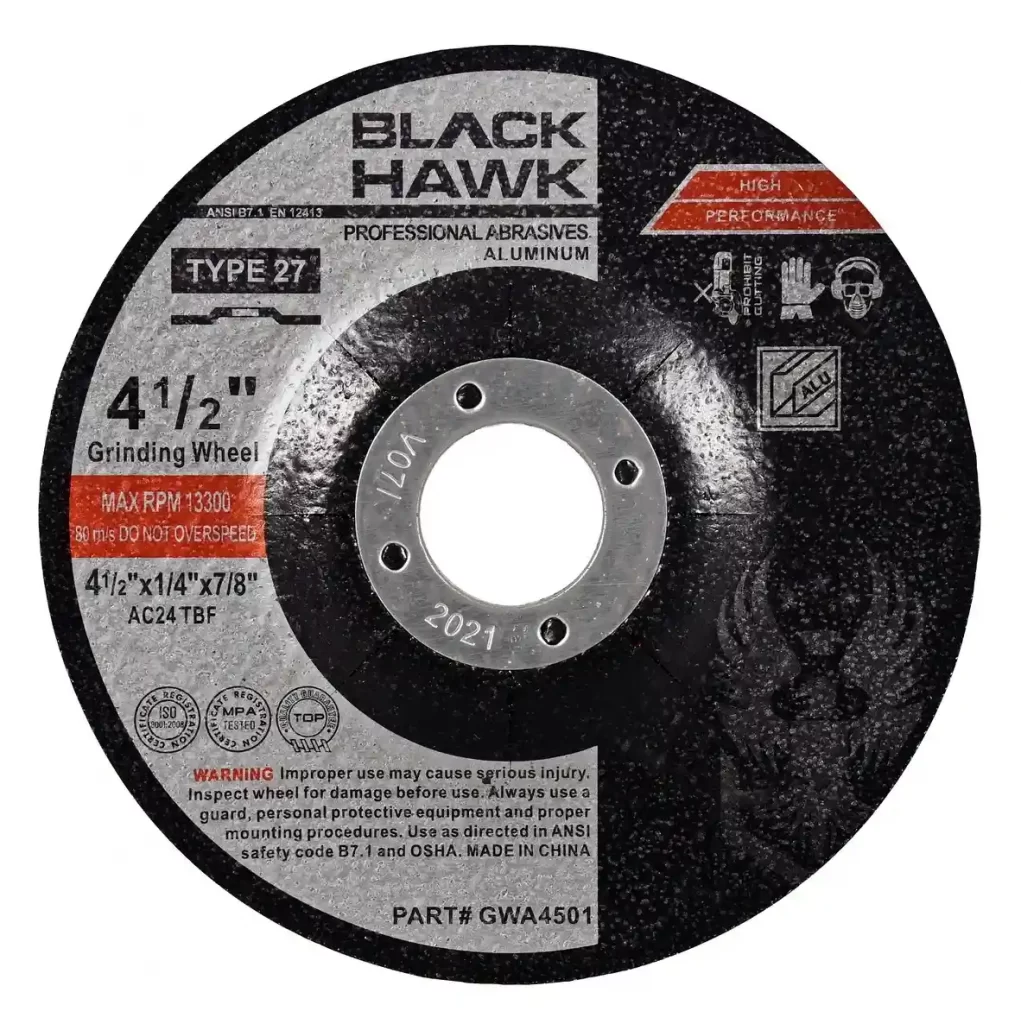
If you want to clean the aluminum with a grinding wheel, use those specially designed for these metals. They have special waxes and other materials embedded in the wheel, which makes them loading proof.
Many welders like to use a hand wire brush to clean its surface layer because it’s a very soft metal, and you can do it by hand. This is a good idea but make sure to use a stainless steel brush.

Using a wire brush wheel with a grinder is not recommended, though, especially with a high RPM setting. Since this metal is so soft, all you will do is push the impurities and the oxide layer deep into the metal.
Additionally, your brush should have fine bristles and be on the softer side. Hard, heavy brushes, especially knurled, will have a hard time cleaning the oxide layer. Parts of the coating may get stuck in the material, while other parts will get burnished instead of getting removed.
You can also use flap wheels but make sure to keep an even light pressure. A high-quality T29 flap disc for aluminum is a good choice and should be used at a 15-degree angle to the workpiece.
Try to provide maximum surface contact, and sand off the oxide layer in the direction of your choice. It’s best to constantly force the oxide layer off the material in the selected path with each grinder stroke.
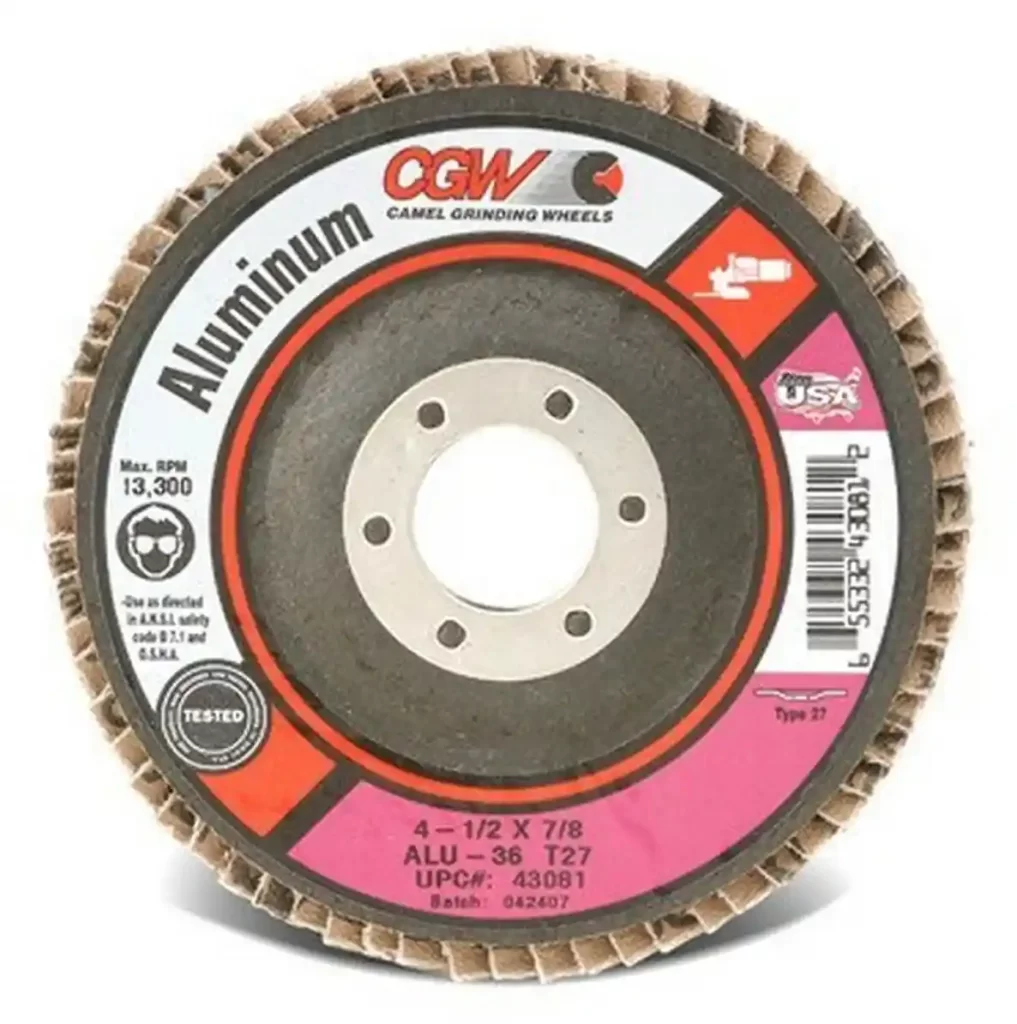
Every abrasive you use, and the wire brush, has to be dedicated to aluminum only. Don’t use it with steel because these tools will get contaminated and lead to poor-quality aluminum welded joints.
After removing the oxide layer, it’s important to wipe the aluminum again with the acetone wipes. That way, you’ll remove any fine aluminum oxide dust and oils that the piece was exposed via the air during the cleaning process.
The clean piece can wait a few days before welding, but it’s best if you weld immediately. As soon as you are done with the cleaning, the oxide layer will start forming. A microscopic thin layer will be developed within seconds, but this won’t affect the welding process. However, if you wait a week or so, you’ll have to remove impurities again.
If you wish to learn more about welding this metal proceed to our separate article. We covered different welding processes, troubleshooting, and various aluminum alloys.
Abrasive safety and some additional tips
Now that we’ve covered the three most important metals you’ll be welding, let’s talk a bit more about the abrasives themselves.
The number one safety tip is never to mistake cutting wheels and grinding wheels. Cutting wheels are thin because they need to concentrate the vertical force on the working edge and minimize the cut width.
Cutting wheels are not designed to take side loads. They will break, explode, and send shards flying all over the place. Once these thin wheels start spinning fast, they become very elastic as the centrifugal forces are high.
Adding a side pressure force will interfere with the vertical force stemming from the wheel’s core and following along its plane.
Once these two forces meet, the wheel will break, and you, or someone else in the area, may get seriously injured. When using an angle grinder or other rotary tools, it’s essential to wear safety glasses AND a clear visor.
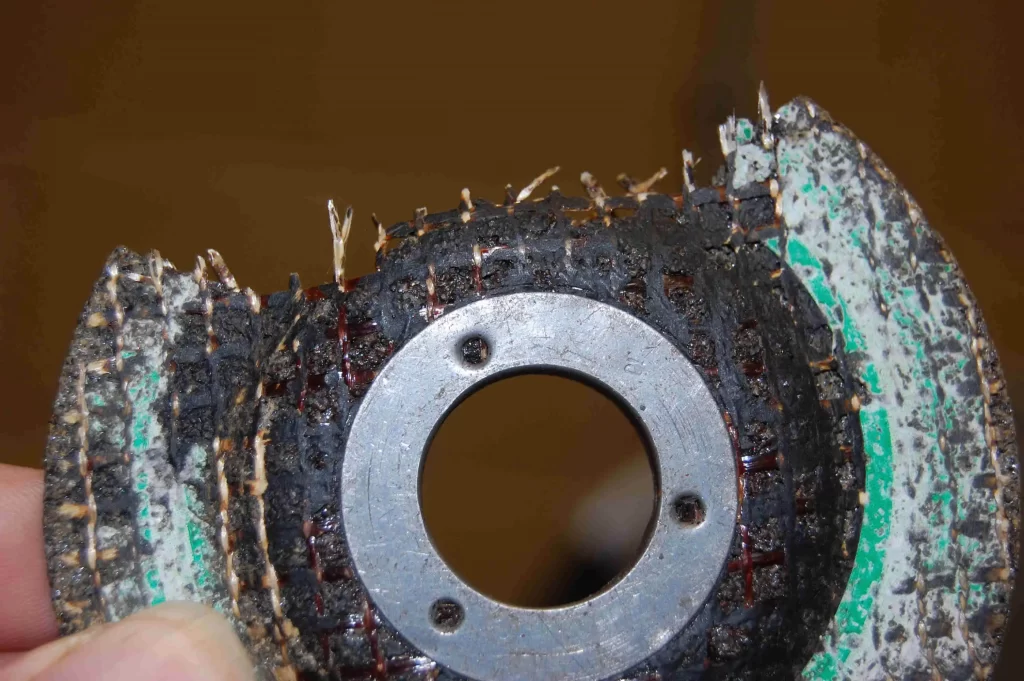
If a grinding wheel piece hits your face, just because your eyes are covered doesn’t mean that the rest of the face won’t suffer severe consequences. Never remove the guard on the angle grinder, use a bigger wheel than the grinder supports, or use the wheel that’s not rated for the rotary tool’s RPM.
Angle grinder wheels are typically bonded with organic compounds. Therefore, you shouldn’t use a wheel beyond its “use by” date. Typically, these compounds are safe for three years, but you should check your grinding wheel markings. After their degradation, the bonds won’t be as strong, and the wheel may fail.
And above all, always follow the ANSI B7.1 standards for grinding wheel safety.
Basic abrasive differences
There are so many abrasive types, coatings, grits, and application methods that you are unlikely ever to use them all. Still, keeping that in mind, you should check if the abrasive you plan to use is suitable for your application.
We covered the basic three metals above in some everyday use scenarios. However, if you need to do something unorthodox, there is an abrasive for it. All you have to do is check the abrasive spec sheet and find the one that matches your needs.
Flap wheels have three different backing plate types. Fiberglass, which is most popular and you are likely to use, plastic that can be trimmed for longer disc life, and metal is an excellent choice if you have to press hard on the material.
Your abrasive can vary in density. High density means that the abrasive material covers the broader area of the disc’s surface and is used for finishing or fine sanding. In contrast, standard density is used for typical stock removal and heavy-duty work.
Abrasive grit material determines the price, wheel loading resistance, application, heat generation, grit’s method of supplying fresh sharp surface after the previous bit is ground off, etc.
That was a quick overview of some typical information you need to know. With that, you are covered for most jobs. I don’t want to make this section any longer, so let’s proceed to some exciting stuff!
Joint Type Selection and Edge Preparation
Joint type selection will depend on the expected end results and how you envisioned two pieces of metal to fit together.
Your options are butt joint, lap, tee (T-joint), corner, and edge welding joints. All of these can have different grooves and styles for binding two pieces together.
You have a regular square groove, V, Bevel, U, and J groove as the most common. Others include a plug, slot, spot, and corner flange.
Of course, there is the famous fillet joint that doesn’t require any special edge preparation and is the most commonly used method of lap and T joint fusion.
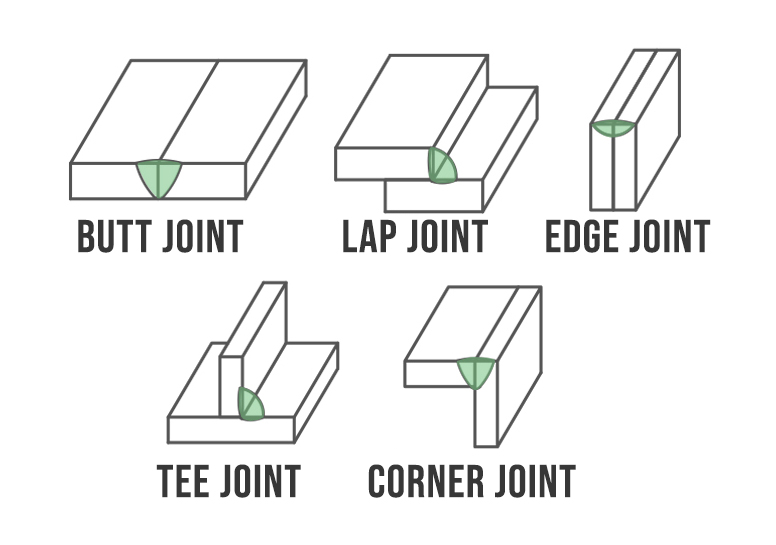
You can learn more about each of these in our separate article about the types of welding joints here.
Welding edge preparation – Bevel joint
We will focus on the most common edge preparation methods like the V and bevel joints. These are the most economical welds up to 3/4 in of weld penetration, after which the J and U welds become more efficient for heavy welding.
However, the difficulty of edge preparation for J and U grooves, and the difficulty of welding these are why most people won’t bother unless required.
Beveling the edge is done to improve joint penetration for proper reinforcement on thicker pieces.
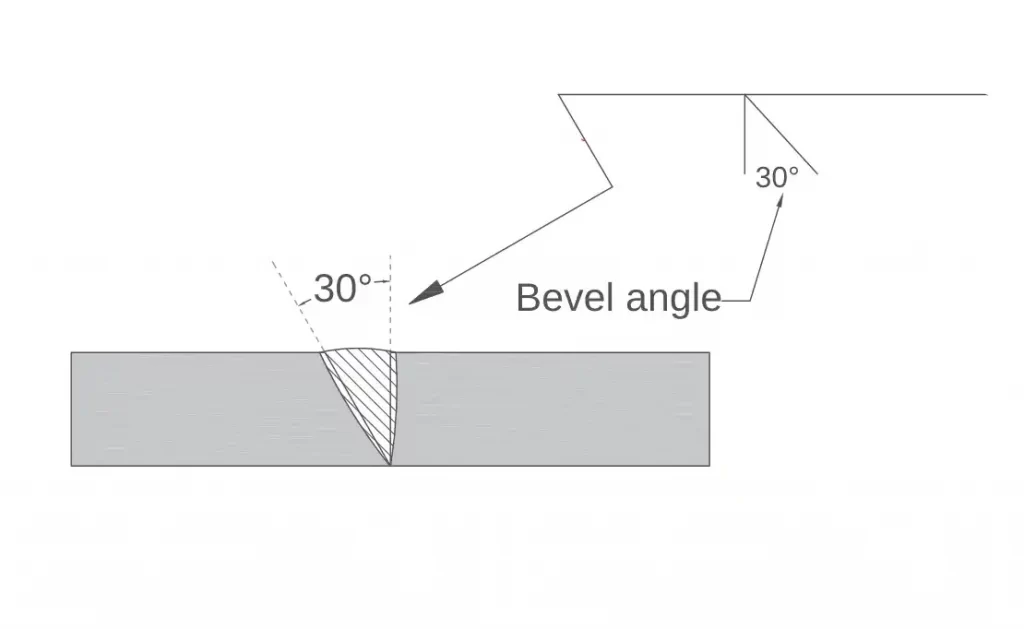
You can also slightly bevel thinner pieces if the welding bead will be ground off and the surface is to be flushed. That way, you’ll ensure proper weld penetration in both metal pieces.
When preparing the edge, make sure that it’s evenly beveled across the length of the joint. Otherwise, the penetration depth will vary along the weld.
Minor differences in bevel quality are typically accepted but if you are working with exotic metal like aluminum or the weld penetration needs to be perfect, you should make the bevel edge perfect along its length.
The bevel angle depends on many factors, but grinding both edges equally to a 45-degree angle will suffice for most welding jobs.
For professional work, you should stick to the engineer’s blueprint. The angle depends on the thickness, what welding process you are using and the electrode type, the metal’s heat tolerance, and other factors.
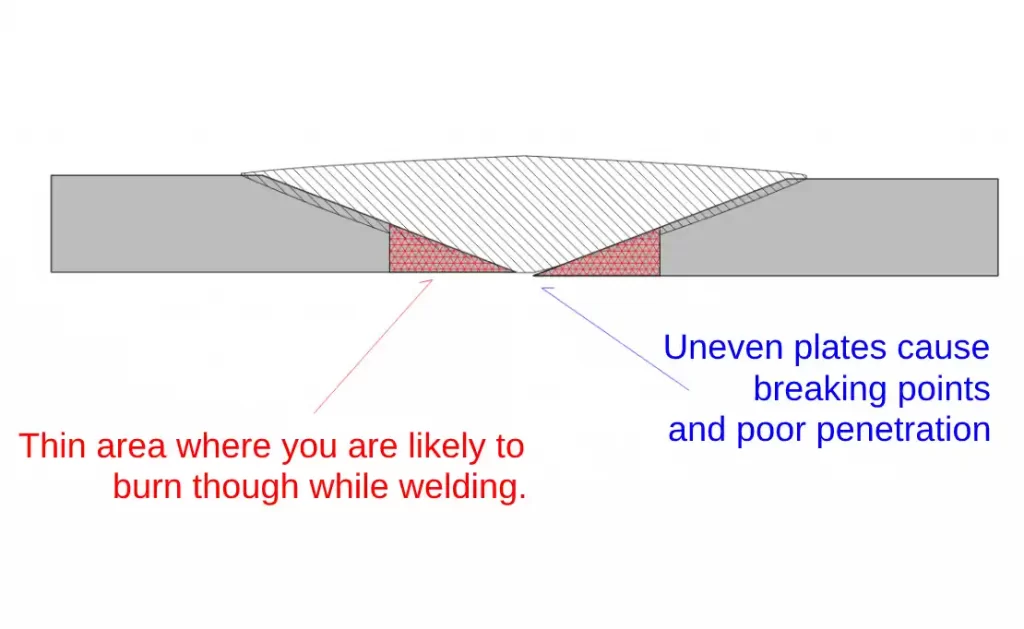
If you are working with thinner metal, you should probably avoid low bevel angles like 30-degree or below. This could thin out the piece even more and lead to cutting instead of welding. The lower edge could just melt because it’s difficult to control the heat when welding at low angles while penetrating both materials.
It’s also important to make sure both metal pieces sit in the same plane. Otherwise, the bottom edge of the lower part may not get good penetration. This leads to poor weld quality and represents a possible breaking point.
There are many tools you can use to prepare the edge. Most people will use an angle grinder, so that’s where I will focus the most, but there are also machines like nibbling chamfers, mills, laser cutters, plasma cutters, and a mechanical beveler.
Using the angle grinder for beveling the edge
Beveling the edge with the grinder is what most people will do, but this is only practical up to about 3/8 of an inch thick metal. Above that, it becomes a slow, tedious process. It can be done if you are doing 1/2 in, but it will take a long time.
Above 3/8 in, you can simply use an oxy-acetylene torch or a plasma cutting machine to bevel the edge and just do some post-cut cleanup.
When beveling with the angle grinder, you should use a wheel designed for heavy stock removal. That way, the process will be faster.
Ceramic or zirconia abrasives are a good choice depending on the metal. While the grit can be as low as 36 since the edge surface will be melted while welding unless otherwise specified.
Keep the grinder almost parallel to the edge you are preparing, but use the outer wheel’s ring for contact. Grind with repeated movements and try to keep the bevel edge uniform. If you notice any high points, grind that area a bit before going back to repeated motion until the bevel edge is complete.
For a beginner, it’s best to mark the angle on the piece with a metal sharpie and grind it down until you reach the angle lines.
You can also use a flap disc afterward to even things out, but the edge doesn’t have to be perfect for most mild steel jobs. Additionally, you can also use the heavy-duty flap discs to bevel the edge, but they are more expensive than grinding wheels and don’t last as long, so it’s not very economical.
When it comes to stainless and aluminum, all the same rules apply, as discussed above. Be mindful of heat, finish quality requirements, and cross-contamination.
Conclusion
And that’s it for this massive guide. We haven’t covered the joint machining, but that’s because most people won’t have the beveler or other machinery available. Beveler is an incredible tool that cuts down on the effort and time needed to bevel the joint drastically.
The most important part of the metal preparation for welding is the cleaning process. Remember this and continuously educate yourself on this aspect of welding work. There is so much more to say about it that it’s a miracle no one ever wrote a dedicated book on the topic.
MIG welding will tolerate more impurities than TIG welding, while stick can even weld rusty metal. However, you should have proper metal preparation even if welding stick, unless you are satisfied with below-average results.
Abrasive selection and appliances play a vital role in getting everything done correctly. Abrasive safety is another aspect responsible for your well-being. Safety is the number one priority when working with metals, and with that, I’ll finish this guide.
Resources:
- ANSI B7.1 – Grinding Wheel Safety Full PDF
- 5 steps for proper weld preparation by Rick Hopkins at www.thefabricator.com
- Tips for preparing your material before welding by John Thompson at www.thefabricator.com
- Safe practices for wire brushes and abrasives by Karen Burke and Rick Hopkins at www.thefabricator.com
- How to prep metal for welding by JamesR at Eastwood
- The Significance of Welding Preparation at www.aquasolwelding.com
- 8 Ways to Prep Metal for Welding at bakersgas.com
- How to Select the Right Flap Disc for Your Project at www.nainc.org
- What You Need to Know About Cleaning and Preparing Aluminum Filler and Base Metals Before Welding at Millerwelds.com
- Ultimate Guide – Stainless Steel – Fabrication, Grinding, and Finishing with Abrasives at www.empireabrasives.com
- Welding Handbook by American Welding Society
- Andrew Pearce – Farm and Workshop Welding


