Tungsten Inert Gas (TIG) welding is a highly sought-after skill in the world of metal fabrication. But, mastering this technique can be challenging, especially for beginners. If you’re interested in TIG welding, you’ve come to the right place.
To help you get the best out of it, we compiled beginners guide to TIG welding techniques. From setting up your welding machine to welding different materials and thicknesses, we’ve got you covered, as this guide will provide you with everything you need to know to get started on your TIG welding journey.
What is TIG Welding, And Why Is It Used?
Tungsten Inert Gas (TIG) or Gas Tungsten Arc welding is a welding process that uses a non-consumable tungsten electrode to produce a high-quality, precise weld.
The process uses an inert gas, usually argon, to shield the welding area from atmospheric contamination. TIG welding is commonly used to join thin sections of stainless steel, aluminum, magnesium, and copper alloys, but it can also be used for thicker sections.
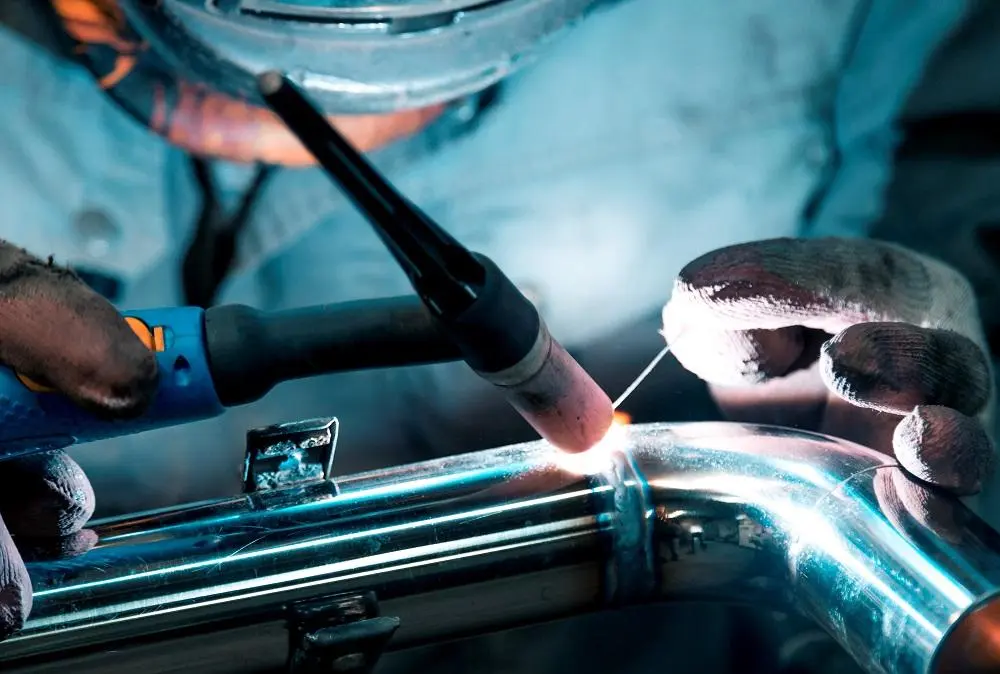
TIG welding offers many advantages over other welding techniques, such as MIG welding (gas metal arc welding), including precise control of the arc and heat input, excellent weld quality, and the ability to weld a wide range of materials. Because TIG welding does not require a flux, it produces a clean, slag-free weld with minimal post-weld cleaning required. TIG welding is also highly versatile and can be used for a variety of applications, including aerospace, automotive, construction, and manufacturing.
One of the reasons why the TIG welding process is so widely used among welders and in the industry is its ability to produce high-quality welds on a wide range of materials. TIG welding produces a weld that is free of porosity, which is essential for applications where the weld must meet strict quality standards. Additionally, TIG welding produces very little spatter, which helps reduce cleanup time and the need for post-weld finishing. Finally, TIG welding offers excellent control over the arc and heat input, which allows welders to produce precise, repeatable welds.
Beginners Guide To TIG Welding Techniques
TIG welding techniques involve several key factors that can affect the final quality of the weld. Most importantly, any beginner welder should pay attention to:
- Torch angle
- Arc length
- Travel speed
- Filler metal distribution
- Gas flow
Each of these factors plays a critical role in the final quality of the TIG weld. A skilled TIG welder must understand how to adjust these factors to achieve the desired weld characteristics, including depth, width, strength, and appearance. With proper technique, practice, and our TIG welding tips, TIG welding can produce high-quality, precise welds on a wide range of materials.
TIG Torch Angle
The torch angle is the angle at which the TIG welding torch is held relative to the workpiece. As a general guideline, a torch angle of 10-15 degrees is commonly used with TIG welding. However, the correct torch angle when TIG welding depends on several factors, including the thickness of the material being welded, the joint configuration, and the welding position.
The angle affects the shape and penetration of the weld. When the torch angle is too steep, the arc will be focused in a small area, leading to a narrow, deep weld.
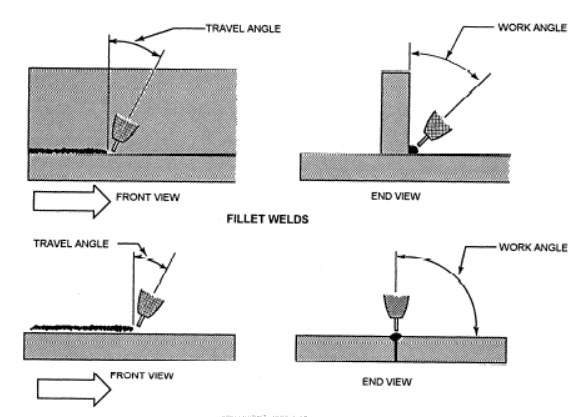
Conversely, if the torch angle is too shallow, the arc will be spread out over a larger area, resulting in a wider, shallower weld. For thinner materials, a torch angle of around 10-15 degrees is recommended. This allows the welder to maintain good control over the arc while producing a narrow, deep weld. A narrow weld is desirable for thinner materials because it reduces the risk of burn-through or warping.
For thicker materials, a torch angle of up to 45 degrees may be required. A steeper angle will help distribute the heat over a wider area, allowing the weld to penetrate deeper into the workpiece. This is important for achieving a strong, durable weld on thicker materials.
What Is The Correct Arc Length?
The arc length in TIG welding is the distance between the tungsten electrode and the workpiece. The ideal arc length can vary depending on the type and thickness of the material being welded, as well as the welding position and joint configuration.
However, as a general rule, the correct arc length is typically between 1/16 to 1/8 of an inch (1.6 to 3.2 millimeters). Maintaining the correct and consistent arc length is critical for achieving a high-quality TIG weld.
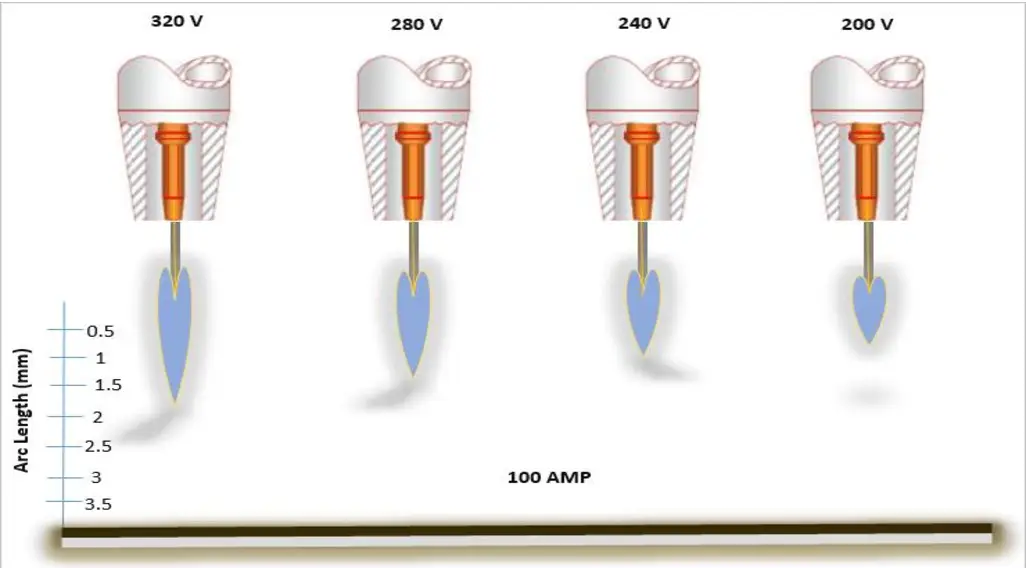
When the arc length is too short, the electrode can become contaminated or even fuse to the workpiece, resulting in an unstable arc and poor weld quality. When the arc length is too long, the arc becomes unstable, and the weld pool can become shallow, leading to poor penetration and weak welds.
A shorter arc length will generally produce a more stable arc and a narrower, deeper weld, while a longer arc length will produce a wider, shallower weld. For thinner materials, a shorter arc length is typically used to produce a narrow, deep weld that minimizes the risk of burn-through or warping. For thicker materials, a longer arc length may be necessary to achieve adequate penetration and fusion.
To maintain the correct arc length, TIG welders must use proper torch technique, including maintaining a consistent distance between the tungsten electrode and the workpiece, and adjusting the torch angle and travel speed as needed. It’s also important to keep the tungsten electrode sharp and free of contamination to ensure a stable, high-quality arc.
Travel Speed in TIG Welding
The travel speed in TIG welding (GTAW) is the speed at which the welder moves the torch along the joint. The ideal travel speed can vary depending on the type and thickness of the material being welded, as well as the joint configuration and welding position. However, as a general guideline, the correct travel speed is typically between 1 to 4 inches (25 to 100 millimeters) per minute and 4 to 6 inches per minute (ipm) / 100 to 150 mm/min..
Maintaining the correct travel speed is important for achieving a high-quality TIG weld. When the travel speed is too slow, the heat input can become too high, leading to excessive melting, burn-through, or warping. Conversely, when the travel speed is too fast, the weld pool may become too shallow, resulting in poor penetration and weak welds.
A slower travel speed will generally produce a deeper, narrower weld with better penetration and fusion, while a faster travel speed will produce a wider, shallower weld. For thicker materials, a slower travel speed may be necessary to ensure adequate penetration and fusion, while for thinner materials, a faster travel speed may be used to minimize heat input and reduce the risk of burn-through or warping.
To maintain the correct travel speed, TIG welders must use proper torch technique, including maintaining a consistent distance between the tungsten electrode and the workpiece, and adjusting the torch angle and arc length as needed. It’s also important to maintain a steady hand and avoid excessive or uneven movements that can affect the quality of the weld.
How The Type And Size Of The Filler Metal Can Affect the Strength And Appearance of the TIG weld?
The type and size of the filler metal used in TIG welding can have a significant impact on the strength and appearance of the weld.
The filler metal is a wire or rod that is added to the weld pool to help fill gaps and join the two pieces of metal being welded together. The filler metal can be made of a variety of materials, including steel, stainless steel, aluminum, and copper, and it can come in various sizes and shapes.
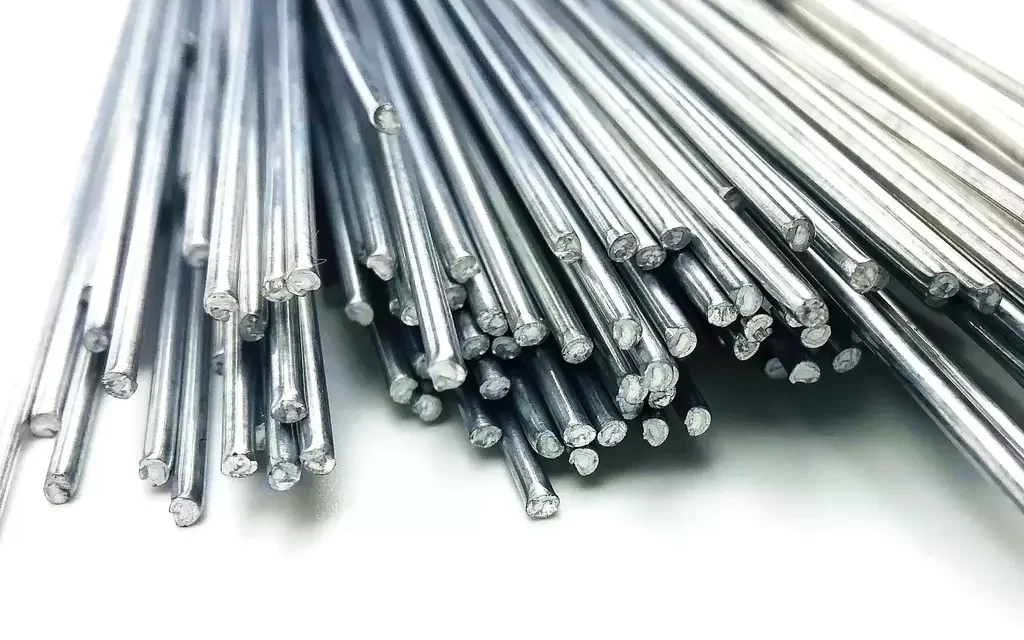
The type of filler metal used in TIG welding will depend on the type of metal being welded, as well as the desired properties of the weld. For example, if welding stainless steel, a filler metal that is also stainless steel may be used to ensure a strong, corrosion-resistant weld.
The size of the filler metal also plays an important role in the strength and appearance of the TIG weld. Using a filler metal that is too large can lead to excessive heat input, resulting in a wide, shallow weld with poor penetration. On the other hand, using a filler metal that is too small can result in a narrow, deep weld that may be prone to cracking or lack sufficient strength.
Choosing the correct size of filler metal is also important for achieving a smooth, aesthetically pleasing weld. A filler metal that is too large can leave a visible bead or lump on the surface of the weld, while a filler metal that is too small may not fill the joint adequately, resulting in a weak or incomplete weld.
TIG Welding Rod Distribution
Distributing the filler rod into the GTAW Welder’s welding gap is an important aspect of creating a high-quality weld. The key to the proper distribution of the filler rod is to maintain a consistent, steady motion and avoid excessive heat input. Here are the steps for properly distributing the filler rod:
- Position the filler rod: Hold the filler rod in your non-dominant hand and position it near the joint to be welded. Keep the rod at a slight angle, with the tip of the rod pointing in the direction of the weld.
- Establish the arc: Use the TIG torch to establish the arc and create a small molten puddle at the start of the joint.
- Insert the filler rod: Gently insert the filler rod into the molten puddle at the leading edge of the weld. Angle the rod slightly to ensure that it enters the weld pool smoothly and without causing any excessive heat input.
- Distribute the filler rod: Move the filler rod along the joint in a smooth, steady motion, using your non-dominant hand to guide the rod and your dominant hand to control the torch. Keep the filler rod at a consistent angle and distance from the weld pool, and maintain a steady flow of filler metal into the joint.
- Repeat as needed: Continue to distribute the filler rod along the length of the joint, adding more filler metal as needed to ensure complete penetration and fusion. Be careful not to add too much filler metal, which can lead to excessive heat input and distortion of the weld.
- Finish the weld: Once the weld is complete, slowly remove the TIG torch and filler rod from the joint to allow the weld to cool and solidify.
Shielding Gas Flow
Shielding gas flow is a critical component of TIG welding that plays a significant role in the quality and appearance of the weld. The appropriate flow rate of shielding gas depends on several factors, such as the type of gas, the size of the nozzle, and the welding conditions. Typically, the recommended flow rate for argon gas ranges from 10-30 cubic feet per hour (cfh).
Insufficient flow rates of shielding gas can lead to poor-quality welds. Inadequate shielding can cause atmospheric contamination, such as oxidation or nitration, which can result in porosity, lack of penetration, and other defects.
Freehand TIG Welding Technique
The Freehand TIG process, also known as manual TIG welding, is a welding technique where the welder holds the TIG torch by hand and manually feeds the filler rod into the weld pool. This technique requires a high level of skill and control, as the TIG welder must maintain a consistent torch angle, arc length, and filler metal feed rate to produce a high-quality weld.
Freehand TIG welding is widely used in various industries, including aerospace, automotive, and construction, where high-quality, visually appealing welds are required. This technique is particularly useful for welding thin materials, such as aluminum or stainless steel, where precision and control are critical.
Stacked Dimes
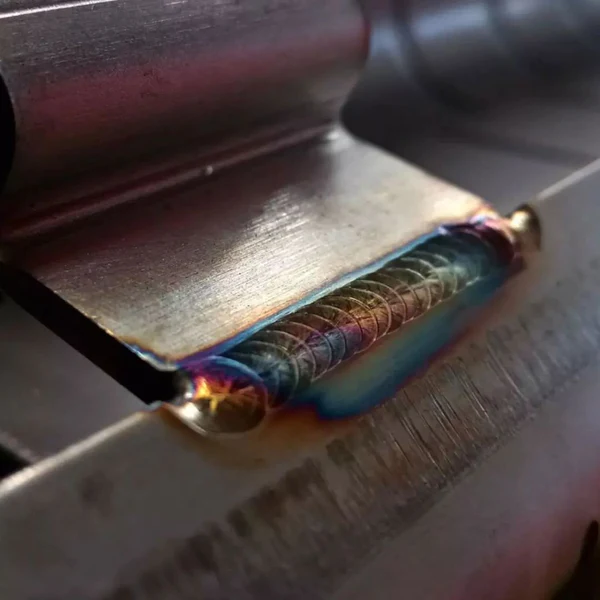
Stacked dimes TIG welding technique is a welding technique that produces a visually appealing weld that resembles a stack of dimes. This technique is commonly used in welding applications where appearance is important, such as in the automotive, aerospace, and art industries.
The key to achieving the stacked dimes look is to maintain a consistent size and spacing between the welds. This can be achieved by adjusting the travel speed and filler material deposition rate to create the desired size and spacing of the welds.
One advantage of the stacked dimes TIG welding technique is that it produces a weld that is not only visually appealing but also has excellent strength and durability. However, it requires a high level of skill and practice to achieve the desired results.
Walking the Cup TIG
The walking-the-cup technique is a TIG welding technique that involves using a specialized welding torch that has a cup-shaped nozzle attached to it. The nozzle is designed to fit snugly over the weld joint, allowing the welder to move the torch along the joint while maintaining a constant torch angle and distance from the workpiece.
In the walking-the-cup technique, the welder holds the torch with one hand and rests the other hand on the cup-shaped nozzle.

The cup serves as a guide, allowing the welder to move the torch in a controlled manner along the joint. As the torch moves along the joint, the welder can adjust the angle of the torch to maintain a consistent arc length and control the width and depth of the weld bead.
This technique is commonly used in industries that require precise and consistent welds, such as pipe welding, where it is essential to maintain a consistent weld bead size and shape. The walking-the-cup technique can also be used on flat surfaces and other joint configurations.
Do You Push Or Pull With TIG Welding?
TIG welding typically uses the push technique, where the torch is pointed in the direction of travel, and the filler metal is fed into the leading edge of the weld pool.
The push technique is preferred because it allows the welder to better see the weld puddle and maintain a consistent torch angle, which is essential for producing high-quality TIG welds.
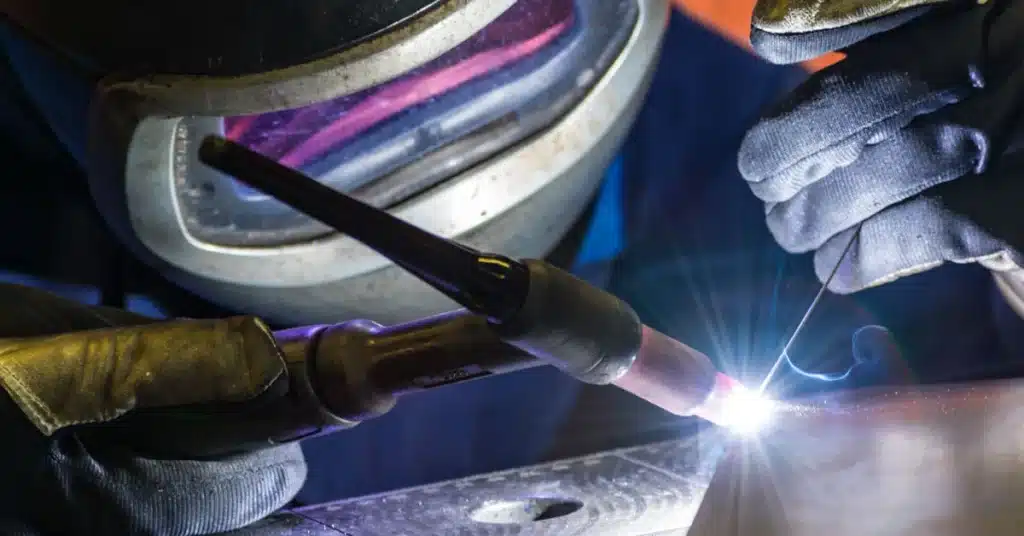
When using the push technique, the torch is held at an angle of 5-15 degrees and moved forward along the joint, with the filler metal fed into the front edge of the weld puddle. This method helps to ensure that the filler metal melts and fuses with the base metal, creating a strong and uniform weld.
Conclusion
TIG welding is a highly precise and versatile welding process that can be used to weld a wide variety of materials, including steel, stainless steel, aluminum, and copper. With the ability of welding machines to produce high-quality, visually appealing welds with excellent strength and durability, TIG welding is widely used in many industries, including aerospace, automotive, and electronics, where other welding processes, such as metal inert gas welding (MIG) and shielded metal arc welding (SMAW, or Stick welding) come short.
To achieve the best results in TIG welding, it is important to use proper techniques, such as maintaining the correct torch angle, arc length, travel speed, and filler rod distribution, as well as ensuring the proper flow of shielding gas. By using the right techniques and equipment, TIG welding can produce strong, visually appealing welds that meet the highest standards of quality and precision.
Resources
- https://www.millerwelds.com/resources/article-library/welding-tips-the-secret-to-success-when-tig-welding
- https://www.precgroup.com/tig-welding-tips-beginners/
- https://www.weldingtipsandtricks.com/tig-welding.html
- https://unimig.com.au/6-intermediate-tips-tricks-for-improving-your-tig-weld/
- https://fractory.com/tig-welding-explained/


