Welding is a dangerous occupation, as many hazards such as fumes, fire, or UV/IR light exposure are always present. Luckily you can prevent risks by using adequate gear.
Welding helmets will help you prevent permanent eye damage, but with the ever-growing market, you could be wondering how do I pick one?
Understanding your protective gear is almost as important as actual welding. That’s why we made this welding helmets guide to help you comprehend the most important things before investing in a welding helmet.
We will explain the options and how they can affect your performance, productivity and safety precautions.
Welding Helmets Guide – Auto Darkening or Passive?
Before going through various features of a welding helmet, you will first know the differences between two basic types – auto-darkening and passive welding helmets.
Passive welding helmets have been around the welding industry for so long, but auto-darkening helmets are slowly replacing them.
Standard helmets usually offer one lens with fixed shade #10, which is always active. So yes, the helmet is permanently dark.
Before you start welding, you put your torch into position, snap down the helmet and strike an arc.
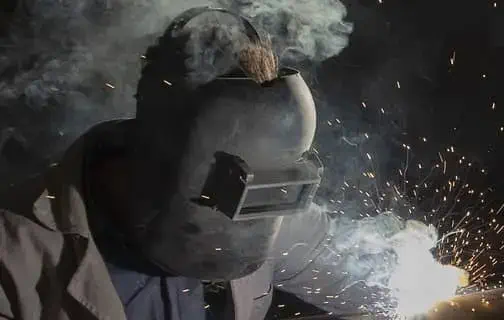
Once you are finished welding, you will have to flip up the helmet to look at your work, set the next piece, and rinse and repeat.
One of the most significant advantages of passive welding helmets is their price. They are cheap and usually long-lasting. However, there are many drawbacks, so auto-darkening helmets replace them.
Firstly, as we noted, passive helmets are always dark. So you cannot see anything before starting an arc, which can be difficult for beginners learning how to position a torch.
Since they are dark, you will have to flip them up and down between the work. Flipping the helmet can be especially hard if you do a lot of tack welding or work in cramped spaces. Finally, doing so will cause neck strain and discomfort after a long day at work.
Designers realized the flaws, so auto-darkening helmets brought many new features that resolved the problems we mentioned. Many welders describe switching from passive to auto-darkening helmets as: “I was blind, and now I can see.”
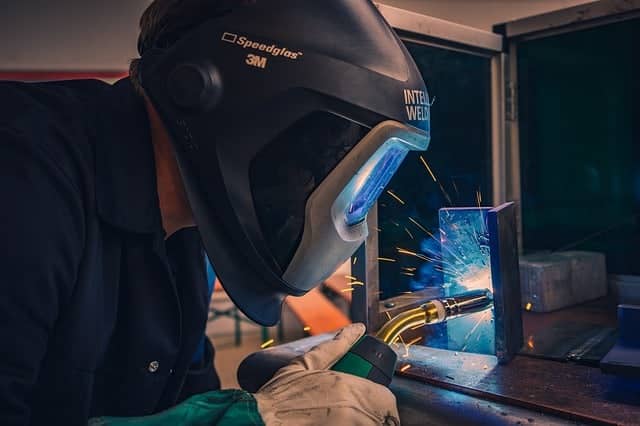
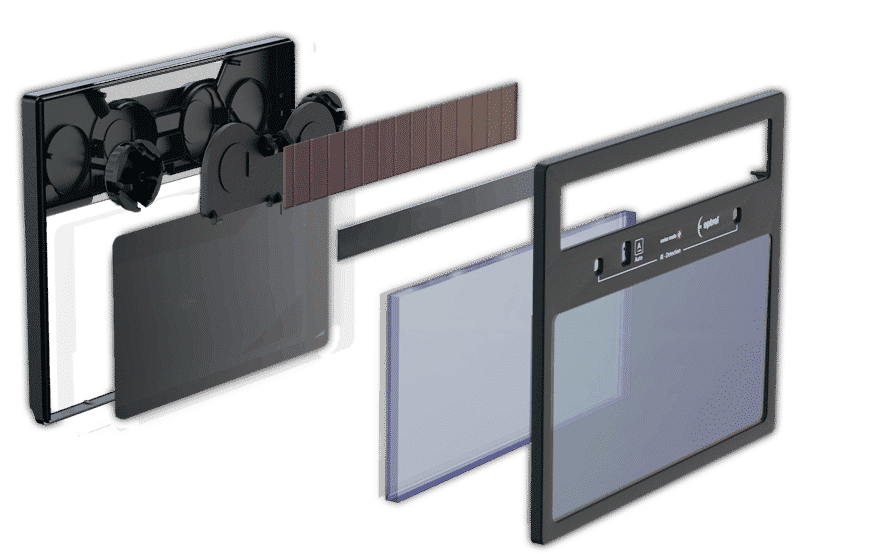
Auto-darkening helmets use an auto-adjusting technique, allowing the lens to adjust from light to dark automatically. The light lens provides #3 or #4 shade, which feels like looking through sunglasses.
The light filter has UV, and IR coatings applied, so your eyes are protected from harmful rays regardless of active/inactive shade settings. In addition, you can change the position of your torch or workpieces without taking off the helmet.
Once you strike an arc, several arc sensors will detect the light. The helmet will darken to #9-#13 shade faster than a blink of an eye. Once you are finished, the helmet will go back to light shade, allowing you to look at your work.
The best part about auto-darkening helmets is that you don’t need to flip them up and down. So with clarity, you get increased productivity and comfort.
Fixed and Variable Shade Lens
All helmets can have either fixed or variable shade selection. A fixed shade lens is an acceptable option if you use a single welding process to join one type of material within the same amperage range. For example, you can use a #10 fixed shade helmet if you are stick welding mild steel at 150 amps.
However, suppose your work includes various metal types, mild steel, stainless steel, or aluminum, with different thicknesses.
In that case, you will have to choose either MIG or TIG welding and various amperage. That’s where variable shade lens thrives.
Most variable shade lenses will allow you to select shades #9-#13. That means the lens will help you weld down to 5 amps or lower, up to 200-300 or even more amps.
Lens Reaction Time – Switching Speed of The Helmet
As we mentioned earlier, all auto-darkening helmets switch from light to dark very quickly, but the time may vary. That’s why each manufacturer specifies the lens reaction time or switching speed of the helmet.
Even though the cheapest ADF helmets will go from light to dark in 1/10.000 of a second, you should always opt for higher speed. Why?
Too slow a reaction time can cause eye discomfort. For example, working an entire shift with a slow helmet by the end of the day will cause eye fatigue, and you could have the dry, scratchy symptoms of arc flash.
Professional grade welding helmets switch from light to dark in 1/25.000 seconds, providing excellent protecting and reducing eye fatigue. However, you will have to pay quite a few bucks for a faster helmet.
Delay and Sensitivity Settings
Besides switching speed, ADF helmets offer two more options that can impact eye comfort: delay and sensitivity.
Delay refers to the helmet’s time to change from a darkened to a lighter state. The short delay helps get the job done faster as you reposition for the next tack weld.
If you are working with high amps, you should give your eyes time to get used to light by increasing the delay.
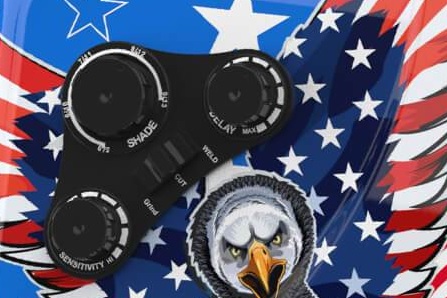
The sensitivity setting is another helpful feature that will help you determine how much brightness will trigger the lens to darken. When TIG welding at low amps, you want to set sensitivity as high as possible. However, remember that even the slightest light can trigger your ADF function, such as a light bulb or sunlight. Therefore, you will have to reduce the sensitivity settings to prevent accidental darkening.
Viewing Area
Helmets with a larger viewing area will help you see a lot more than just a weld. For example, if you work at large sites or in workshops with other welders, you want to be aware of what’s happening around you. In that case, you should look for a helmet with side windows.
The most common viewing size of welding helmets is 4×2″, which is enough for a garage or small shop. However, if you want to see more, a 4×4″ viewing area is a better choice.
Helmet Power – Solar or Batteries
To switch from light to dark the auto-darkening filter will require power. Auto-darkening helmets can use replaceable, irreplaceable batteries and solar cell power or a combination of both.
Auto-darkening helmets with non-replaceable batteries have a limited lifespan. So since you can’t change the battery, you can basically throw away the helmet once it dries out.
However, helmets today usually feature a solar cell that charges the battery, but to a certain amount.
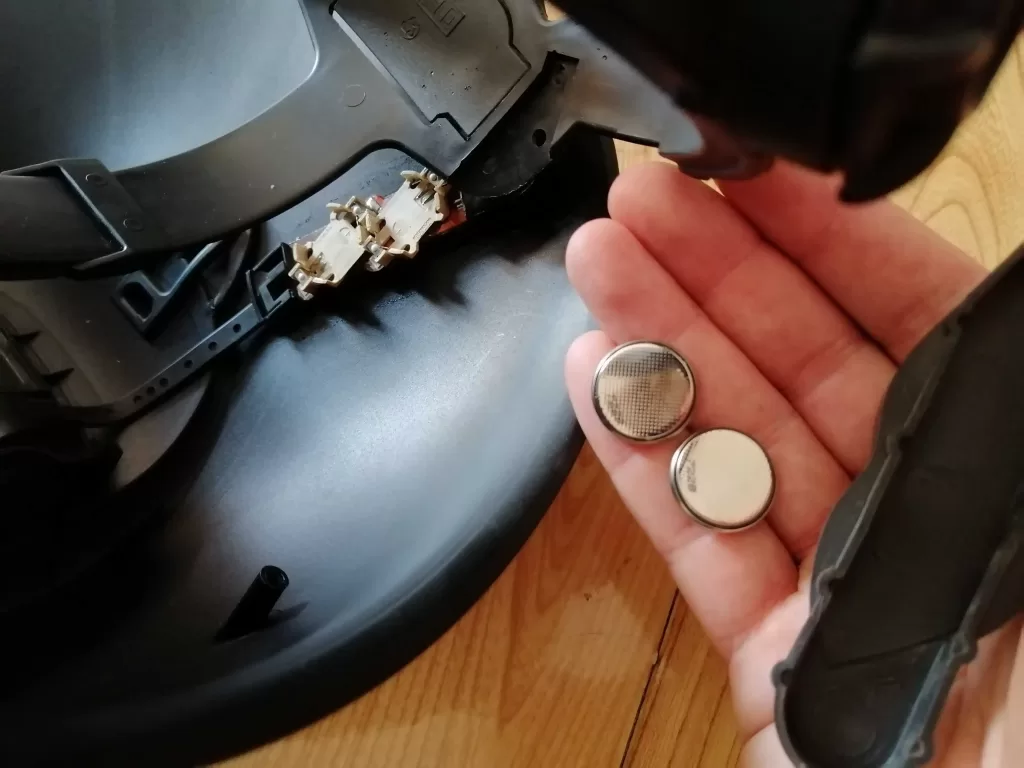
On the other hand, a better investment is a helmet powered by a replaceable battery and solar assist panel. In the past, the ADF mechanism used AAA batteries for economical replacement. However, since they were bulky, they were widely replaced by CR2450 lithium batteries, with a lifespan of over 2000 hrs.
Helmet Weight and Comfort
While helmet weight is not one of the most important factors to consider, it will surely make your day at work more manageable. If you are an occasional welder that spends a couple of hours a day under the hood, you probably won’t mind buying a 2 lbs helmet.
However, professional welders working long hours usually opt for helmets weighing around 1 lb.
A lighter-weight helmet minimizes strain on your neck and reduces fatigue while increasing comfort. In a nutshell, sooner or later, greater weight will cause discomfort.
Safety Regulations and Standards
All helmets can look great on paper, but safety regulations and standards must prove the manufacturer’s claims. Today, welding helmets must pass ANSI Z87.1 – 2003, also referred to as ANSI Z87+ safety regulations and standards.
Experts validate advertised specifications such as switching speeds, darkness shade settings, and other helmet specs through independent laboratory tests to publicize compliance.
That’s why all helmets and lenses must:
- survive high-velocity impact tests from flying objects,
- provide 100 percent ultraviolet and infrared protection,
- meet advertised switching speeds and dark shades in extreme temperatures
According to safety regulations, helmets must perform at temperatures as low as 23 degrees F and as high as 131 degrees F. However, ANSI standards that date back to 1989 require no temperature test guidelines. That’s why you should make sure the helmet packaging and product advertise either “ANSI Z87.1 – 2003” or “Z87+.”
Advanced Features
Auto-darkening helmets were considered expensive in the past, but a technological advancement in the present made them affordable. Some high-end manufacturers introduced advanced features to differentiate from cheap brands and justify the high price.
For example, Miller perfected an X-mode feature, which senses electromagnetic radiation of the weld. This feature will help you eliminate sunlight interference and continuously detects the arc even if sensors are blocked.
Optrel introduced 2.0 crystal lens technology that helps you clearly see what happens during preparation and during and after the welding process. In addition, light shade #2 feels like you don’t have a helmet on while your eyes are protected from IR/UV radiation.
ESAB produces high-end futuristic helmets, while even some budget options such as YesWelder provide you with a true color vision of the weld.
- https://www.lincolnelectric.com/en/Welding-and-Cutting-Resource-Center/Welding-How-Tos/Choose-a-Welding-Helmet
- https://www.tws.edu/blog/how-to/how-to-choose-a-welding-helmet/
- https://www.awsi.com.au/blog/post/5-key-factors-to-consider-when-choosing-a-welding-helmet
- https://www.hobartwelders.com/projects-and-advice/articles/how-to-select-the-right-welding-helmet
- https://www.3m.co.uk/3M/en_GB/worker-health-safety-uk/safety-solutions/welding-safety-centre/select-right-helmet/


