
Autobody welding is vastly different from any other types of welding. In fact, many people do have problems with it and it is clear that one needs to understand it first before actually being able to do it.
Experts will understand that this way of welding greatly differs from, for example, welding bridge girders or thick plates.
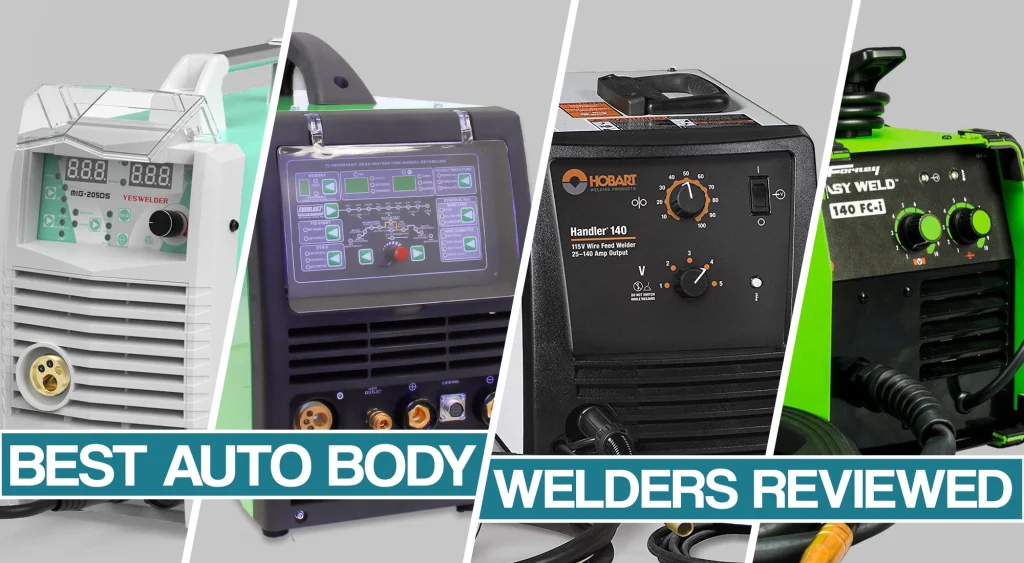
It takes special skills to do it, but also the right kind of equipment as well. Thus today we want to talk to you about different types of welding machines that are used in autobody work. With our help, you will be able to understand how to use and implement the best methods in dealing with this type of welding.
Quick Comparison of the Best Welders For Auto Body
| Image | Name | Voltage | Current | Amperage | Duty Cycle | Process | Check Price |
|---|---|---|---|---|---|---|---|

| FIRSTESS CT2050<br><span style='font-size:11px;color:#888;'>7-in-1 Welder & Cutter</span>Get 10% Off With Coupon: -10% WELDPROS | 96-265V | AC/DC | 5-200A | 100% @ 200A | AC/DC TIG/Plasma/Stick | Check Price |

| Miller Multimatic 220 AC/DC | 120/240V | AC/DC | 20-230A | 25% @ 230A | MIG/Flux/TIG/Stick | Check Price |

| YesWelder DP200<br><span style='font-size:11px;color:#888;'>Dual Pulse MIG</span>Get 10% Off With Coupon: -10% WELDPROS | 120/240V | DC | 30-200A | 60% @ 130A | MIG/Flux/TIG/Stick | Check Price |
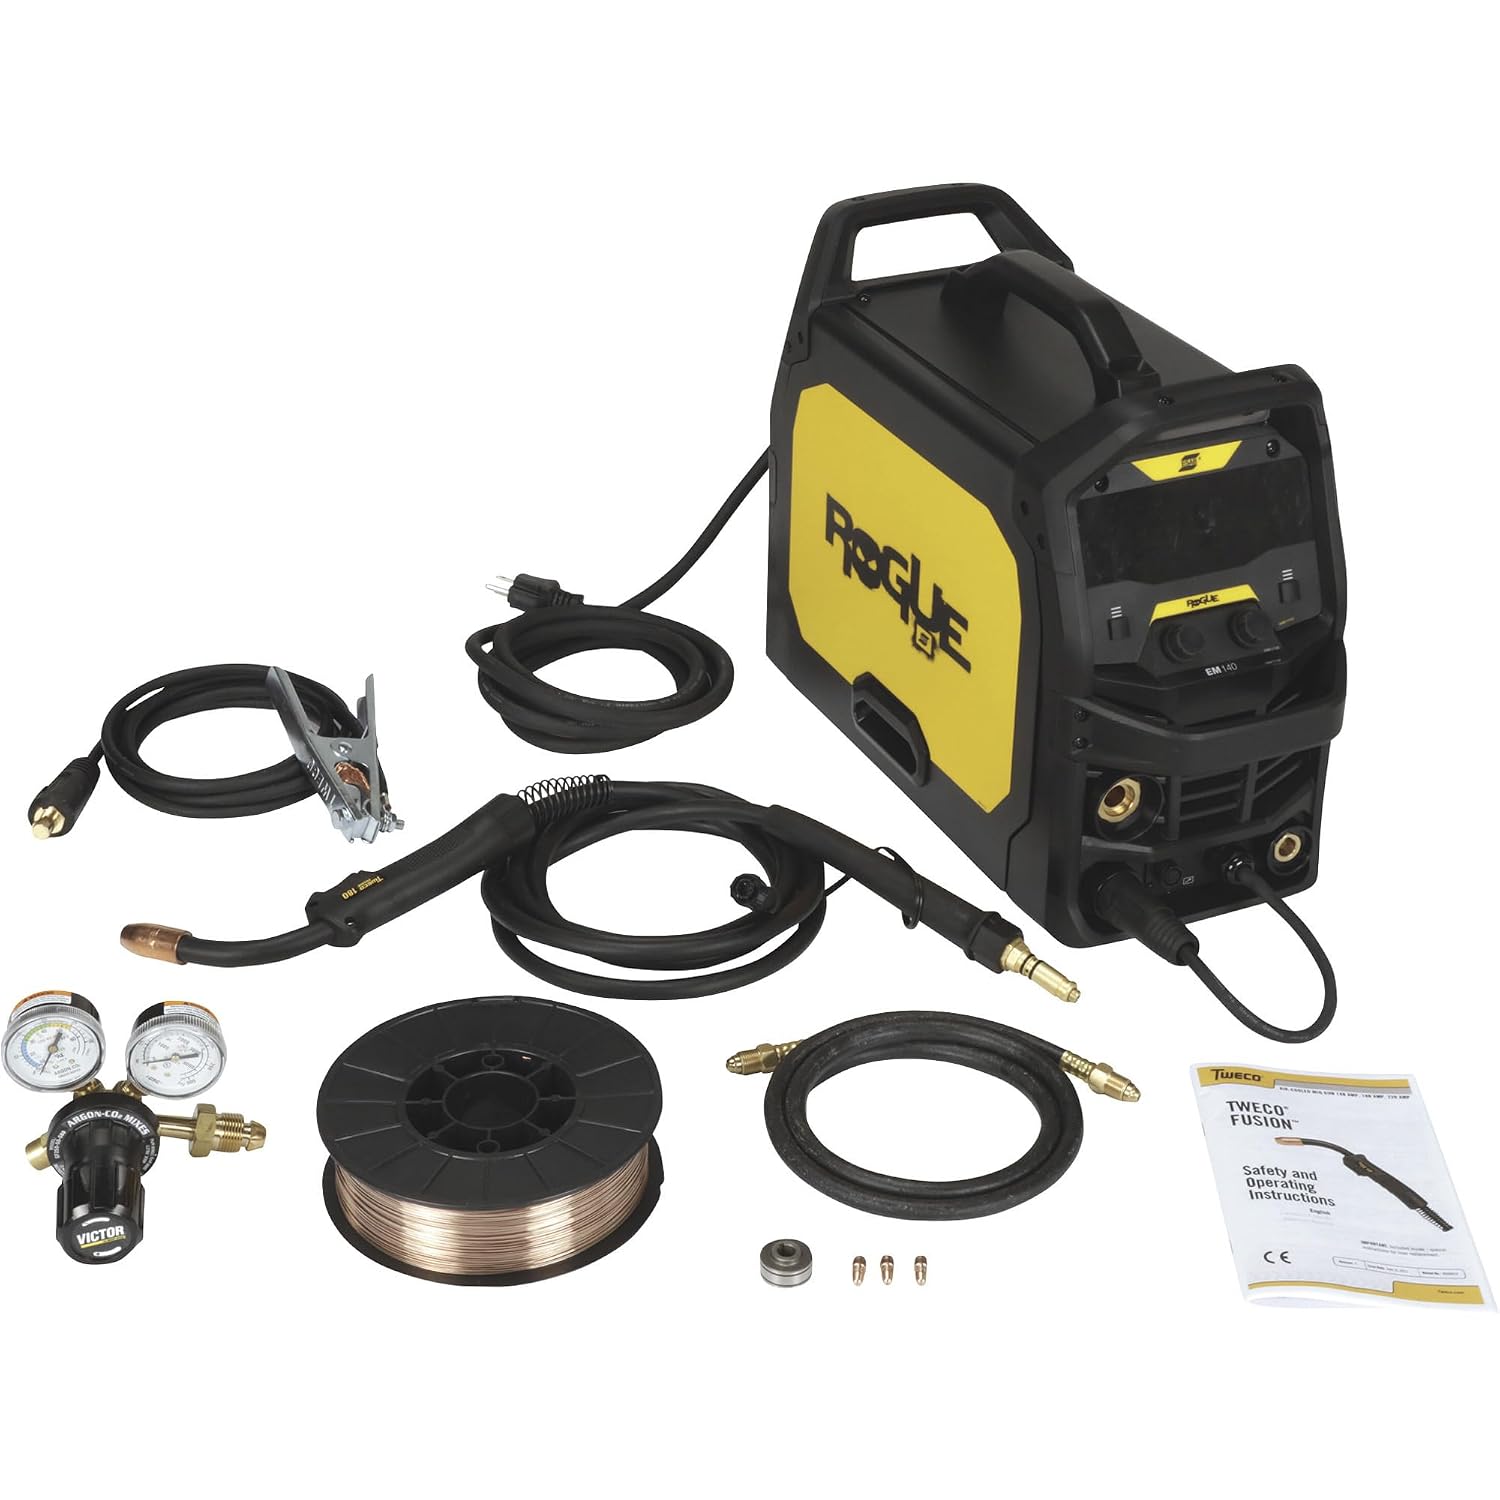 | ESAB Rogue EM 140 | 120V | DC | 30-140A | 30% @ 90A | MIG/Flux-Cored | Check Price |

| Lincoln Electric 90i FC | 120V | DC | 30-90A | 20% @ 90A | Flux-Cored | Check Price |
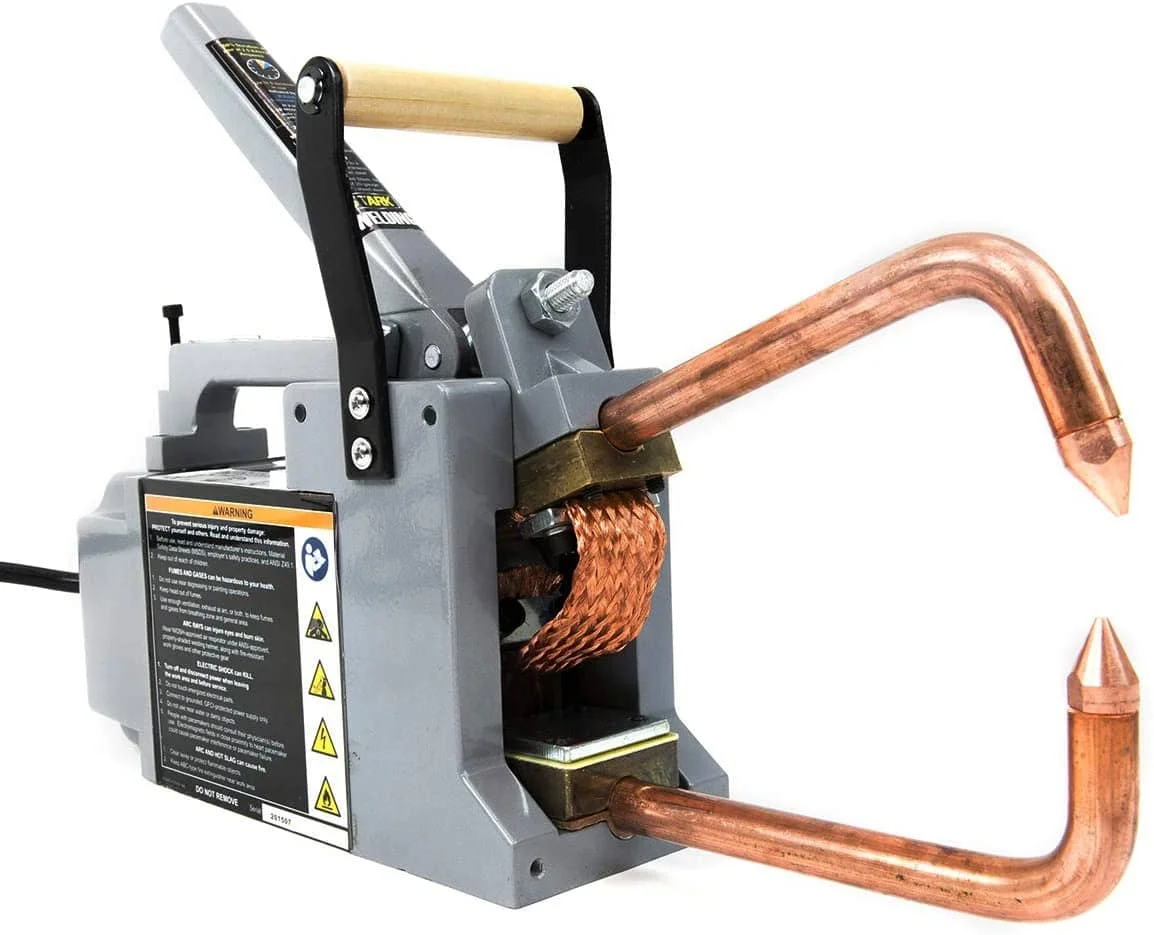 | Stark USA Spot Welder 1/8" | 120V | — | 13.5A Input | — | Spot Welding | Check Price |
Best Welder for Car Panels Review
People often regard skill as something that will help with automotive body welding. However, choosing the best welder for body work will make a much greater difference.
1. FIRSTESS CT2050 – Best 7-in-1 Welder & Cutter
Best 7-in-1 Welder & Cutter
FIRSTESS CT2050
Seven welding and cutting processes in a single machine with a built-in air compressor. The CT2050 does AC/DC TIG, pulse TIG, stick, and plasma cutting without needing external air.
| Process: | AC/DC TIG (Pulse), Plasma, Stick | Voltage: | 96-265V 50/60Hz |
| Amperage: | TIG: 5-200A Stick: 10-200A | Duty Cycle: | 100% @ 200A (TIG) 100% @ 45A (Cut) |
| Current: | AC/DC | Thickness: | TIG: 3/16″ Stick: 1/4″ |
| Weight: | ~40 lbs | Warranty: | 3-Year |
The FIRSTESS CT2050 is the machine you buy when you’re tired of owning three different boxes that each do one thing. It welds AC TIG, DC TIG, stick, and then it cuts plasma with a built-in compressor. You read that right. It has its own air compressor inside the case. For auto body work where you’re switching between welding in a patch panel and cutting out the rusted section, not having to drag a separate compressor around is the kind of convenience you don’t appreciate until you’ve done it the hard way for a few years.
On 220V, the TIG side pushes 200 amps — enough for aluminum up to 3/16-inch and steel up to the same. On 110V you’re capped at 160 amps, which still handles most sheet metal work without breaking a sweat. The pulse TIG mode is where this machine earns its keep on thin auto body panels. You can dial the pulse down to where it barely kisses the metal, which means you’re not blowing holes through 22-gauge door skins. I’ve used cheaper multi-process machines where “pulse” meant the arc flickered a bit. This one actually pulses.
The AC TIG aluminum welding has a smart-set feature that asks you the thickness and joint angle, then sets the parameters. Is it perfect? No — an experienced TIG welder will still tweak the balance and frequency. But for someone who welds aluminum once a month and doesn’t want to re-learn the settings every time, it’s genuinely useful. The foot pedal isn’t included, which stings at this price point. Buy the bundle with the pedal if you’re doing aluminum.
The plasma cutter runs off the internal compressor and cuts up to 1 inch at 220V. On 110V you’re limited to thinner stuff — about 3/8-inch clean. For auto body work that’s plenty. The pilot arc starts without touching the metal, so you can cut through paint and rust without grinding first. The non-HF start means you’re not frying nearby electronics either, which matters if you’re working in a garage with a car full of computers.
The stick welding side handles 6010, 6011, and 7018 electrodes without complaint. That matters if you’re doing frame repair where stick is still the go-to for thick sections. The VRD kicks in automatically when you’re not welding. At 220V you get 200 amps on stick. At just under 40 pounds with the compressor it’s not a machine you toss in the trunk, but the 96-265V wide voltage range means it’ll run on a generator or shitty shop power without tripping breakers. Three-year warranty. At $1,499 it’s not cheap, but buying a separate AC/DC TIG, plasma cutter, and stick welder would cost you more.
Pros
- 7-in-1: AC/DC TIG, pulse TIG, stick, and plasma in one box
- Built-in air compressor — no external compressor needed for cutting
- Pulse TIG actually modulates, not just a marketing checkbox
- Smart AC TIG setup takes the guesswork out of aluminum parameters
- 96-265V wide voltage — runs on generator or bad shop power
- Non-HF pilot arc start won’t fry nearby car electronics
- Handles 6010 electrodes which most inverter machines choke on
- 100% duty cycle at 200A on TIG (220V) — welding all day
Cons
- Heavy at nearly 40 lbs — not a portable machine
- Foot pedal not included at this price
- Plasma cutting on 110V is limited to 3/8-inch
2. Miller Multimatic 220 AC/DC – Best Premium Multiprocess
Best Premium Multiprocess
Miller Multimatic 220 AC/DC
Miller’s flagship compact multiprocess welder. AC/DC TIG for aluminum, MIG with Auto-Set for steel, plus stick and flux core. The machine auto body shops buy when the budget allows.
| Process: | MIG, Flux-Cored, AC/DC TIG, Stick | Voltage: | 120/240V, 1-Phase |
| Amperage: | 20-230A | Duty Cycle: | 25% @ 230A (MIG) 60% @ 150A |
| Current: | AC/DC | Thickness: | MIG: 3/8″ TIG: 1/4″ |
| Weight: | 56 lbs | Warranty: | 3-Year |
The Multimatic 220 AC/DC is Miller’s answer to the question “what if one machine could do everything a body shop needs?” It runs MIG, flux core, DC TIG, AC TIG, and stick. The AC TIG side is what separates this from the cheaper multiprocess boxes. You can weld aluminum body panels without buying a dedicated AC/DC TIG machine. For a shop that does restoration work on older cars with aluminum panels, that one feature justifies the price.
On 240V input, the MIG side pushes 230 amps. That’s enough for 3/8-inch steel in a single pass. On 120V you’re limited to about 140 amps, which handles thin sheet metal fine but won’t do structural frame sections. The Auto-Set feature on MIG mode lets you dial in material thickness and wire diameter, then the machine sets voltage and wire speed. It’s not perfect — I still tweak the settings — but it gets you 90% of the way there in 5 seconds instead of 5 minutes of trial and error.
The AC TIG aluminum welding is what sold me on this machine. You get adjustable AC balance and frequency, which means you can dial in the cleaning action versus penetration. For thin aluminum body panels, I run higher frequency (120Hz) to tighten the arc and higher balance toward penetration. The foot pedal isn’t included, which at this price point is annoying. Budget another $200 for Miller’s RFCS-14 pedal if you’re doing aluminum.
The physical size is impressive for what it does. At 56 pounds, it’s not a lunchbox welder but it’s significantly smaller than a Syncrowave or Dynasty setup. You can put it on a cart and roll it around the shop. The color LCD screen is clear and the menu system is straightforward — no digging through manuals to find settings. Miller’s QuickTech button gives you one-touch access to frequently changed parameters.
Downsides: the duty cycle at max output isn’t stellar — 25% at 230 amps on MIG means 2.5 minutes of welding followed by 7.5 minutes of cooling. For auto body work on thin sheet you’ll never hit that limit. For frame repair where you’re burning rod at 200+ amps, you might. The gun that comes with it is the MDX-100, which is adequate but not great. Plan on upgrading to a Bernard or Binzel gun if you’re using this daily. Three-year warranty from Miller, and their support is actually reachable.
Pros
- True AC/DC TIG — welds aluminum without a second machine
- Auto-Set MIG gets you welding in seconds, not minutes
- 230 amps on 240V — enough for structural frame work
- Compact for a full-featured AC/DC multiprocess machine
- Color LCD with QuickTech one-touch parameter access
- Miller build quality and 3-year warranty
- Runs on 120V or 240V input
- Fan-on-demand keeps noise down when not welding hard
Cons
- 56 pounds — not portable, needs a cart
- Foot pedal not included at this price point
- 25% duty cycle at max output limits heavy frame work
3. YesWelder DP200 – Best Dual Pulse MIG
Best Dual Pulse MIG
YesWelder DP200
YesWelder’s dual-pulse MIG machine with a 7-inch IPS display and smart parameter matching. MIG, flux core, lift TIG, and stick. The dual pulse mode produces TIG-like bead appearance on aluminum and stainless.
| Process: | MIG (Pulse), Flux, DC TIG, Stick | Voltage: | 120/240V, 50/60Hz |
| Amperage: | MIG: 30-200A TIG: 10-200A | Duty Cycle: | 60% @ 130A 100% @ 100A |
| Current: | DC | Thickness: | 1/8″ @ 120V 3/8″ @ 240V |
| Weight: | ~35 lbs | Warranty: | 3-Year |
The DP200 is YesWelder’s most refined MIG machine yet. Dual pulse on a sub-$700 welder was unheard of three years ago. Now you get it with a 7-inch color display that actually shows you what’s happening instead of blinking a red light. For auto body work, the dual pulse mode matters because it reduces spatter and heat input — two things that warp thin body panels fast. You can lay down a bead on 22-gauge that looks closer to TIG than MIG.
The smart parameter matching is a nice touch for beginners. Dial in material type, thickness, and wire diameter, and the DP200 sets voltage and wire speed. In manual mode you get full control over inductance, burn-back, pre-flow, and post-flow. That’s the kind of fine-tuning you usually only find on $1,500+ machines. The 50 memory channels in MIG mode let you save settings for different materials — one channel for 18-gauge steel, another for 1/8-inch aluminum, and so on.
On 240V input, MIG pushes 200 amps. On 120V you’re capped at 120 amps, which is enough for sheet metal but not structural work. The lift TIG mode is DC-only, so no aluminum TIG — you need the MIG side with a spool gun for that. Stick mode maxes at 180 amps on 240V. The dual pulse wave control gives you TIG-like ripples in the bead profile. It’s a visual thing but customers notice it.
The spool gun compatibility is what makes this relevant for auto body. Aluminum body panels need a spool gun unless you’re running a push-pull system. The DP200’s spool gun connection uses a standard 4-pin connector and the machine auto-detects it. YesWelder sells their own spool gun for about $200. The fan-on-demand system keeps the noise down when you’re not welding hard — nice if you’re working in a home garage at night.
Firmware upgrades are a real thing on this machine. YesWelder has pushed two updates since launch that added features. The USB port on the side means you’re not stuck with whatever software shipped from the factory. At 35 pounds it’s manageable for a portable setup. The 3-year warranty and US-based support are better than most budget brands. For $699 it’s a lot of welder for the money, especially if dual pulse is something you’ll actually use.
Pros
- Dual pulse MIG for TIG-like bead appearance, under $700
- 7-inch IPS display — visible in any lighting
- 50 memory channels for material-specific settings
- Smart auto-set + full manual control over inductance and burn-back
- Spool gun compatible for aluminum body panels
- Firmware upgradeable via USB — not locked at factory settings
- Fan-on-demand keeps noise reasonable in a home shop
- 3-year warranty with US support
Cons
- DC lift TIG only — no AC aluminum TIG capability
- 120V performance is limited to sheet metal thickness
- Spool gun sold separately for aluminum MIG
4. ESAB Rogue EM 140 – Best 120V MIG for Sheet Metal
Best 120V MIG for Sheet Metal
ESAB Rogue EM 140
ESAB’s entry into the 120V MIG/flux-core market. 140 amps on a standard household outlet. Designed for sheet metal and light fabrication where 240V isn’t available.
| Process: | MIG, Flux-Cored | Voltage: | 120V, 50/60Hz |
| Amperage: | 30-140A | Duty Cycle: | 30% @ 90A |
| Current: | DC | Thickness: | Up to 3/16″ |
| Weight: | 24 lbs | Warranty: | 3-Year |
The Rogue EM 140 is ESAB’s answer to the question “can I weld in my garage on a regular outlet?” Yes, and it does it better than most. At 140 amps on 120V input, it’s punching above its weight class. Most 120V machines top out at 90-110 amps. The extra 30 amps matter when you’re trying to get penetration on 1/8-inch steel instead of just laying filler on top of it.
It runs both gas-shielded MIG and self-shielded flux core. For auto body work, you want gas MIG with .023 or .030 wire. The Rogue handles both. The wire drive system is all metal — no plastic gears to strip out when you snag the wire. The drive rolls are dual-groove, so you flip them to switch between .023/.030 and .035 wire sizes. It’ll take 4-inch and 8-inch spools, which gives you flexibility on wire purchases.
The arc characteristics are smoother than I expected from a 120V machine. ESAB’s inverter technology keeps the arc stable even when input voltage sags — common in older garages where the wiring isn’t exactly new. The voltage and wire speed dials are infinite, not stepped, so you can fine-tune. That matters on thin body panels where half a volt is the difference between a good bead and a blow-through.
At 24 pounds, this is a genuinely portable welder. You can carry it to the car in one hand and the gas bottle in the other. The duty cycle is 30% at 90 amps, which means about 3 minutes of welding per 10-minute cycle at moderate output. For auto body work where you’re doing short stitch welds on panels, you’ll never hit that limit. For building a trailer from scratch, you will.
The downsides are predictable for a 120V machine. No TIG capability, no stick, no dual voltage. It does MIG and flux core, period. The ground clamp is the cheap stamped-steel kind that works fine for six months and then the spring gives out. Budget $20 for a better clamp. ESAB’s warranty is 3 years parts and labor through authorized service centers. At around $630 it’s pricier than the Lincoln equivalent, but the extra 50 amps of output and the all-metal drive system justify the difference.
Pros
- 140 amps on 120V — more output than most competitors
- All-metal wire drive system, no plastic gears
- Infinite voltage and wire speed dials for fine-tuning
- Smooth inverter arc that handles voltage sag well
- Takes both 4-inch and 8-inch wire spools
- Only 24 pounds — actually portable
- Dual-groove drive rolls for quick wire size changes
- ESAB 3-year warranty through authorized service centers
Cons
- 120V only — no dual voltage, no 240V capability
- MIG and flux core only, no TIG or stick
- Cheap ground clamp — plan on immediate replacement
5. Lincoln Electric 90i FC – Best Budget Flux Core
Best Budget Flux Core
Lincoln Electric 90i FC
Lincoln’s entry-level 120V flux-core welder. No gas, no regulator, no setup complexity. Wire in, plug in, weld. The cheapest way to start welding auto body panels at home.
| Process: | Flux-Cored (FCAW) | Voltage: | 120V, 60Hz |
| Amperage: | 30-90A | Duty Cycle: | 20% @ 90A |
| Current: | DC | Wire Size: | .030″ / .035″ |
| Weight: | 15 lbs | Warranty: | 1-Year |
The 90i FC is the most stripped-down welder Lincoln makes, and that’s exactly why it belongs on this list. No gas solenoid, no TIG, no pulse modes. Just flux-core wire on a 120V outlet. For someone who needs to weld a patch panel into a quarter panel and will never use the machine for anything else, this is the right tool. It costs less than a decent welding helmet.
Output is 90 amps max on a 120V/20A circuit. That limits you to about 1/8-inch steel in a single pass, but auto body panels are typically 18-22 gauge — well within its range. The wire feed speed tracks with voltage, so there’s one dial to adjust instead of two. It’s basically Lincoln saying “set it here for thin metal, here for thicker.” Not precise, but it works.
The wire drive uses a single driven roll with a spring-loaded idler. It’s plastic. At this price point that’s expected. It feeds .030 and .035 flux-core wire from 4-inch spools. Don’t try to run gas-shielded wire through this — there’s no gas valve and the polarity is fixed for flux core. The built-in thermal overload protection shuts it down before you cook the transformer. Let it cool for 10 minutes and you’re back.
At 15 pounds, it’s lighter than some carry-on luggage. You can literally hang it from a hook on your workbench. The handle is molded into the case, not bolted on. The whole thing feels like an appliance rather than industrial equipment. Lincoln’s fit and finish on even their cheapest machines is better than most no-name Amazon welders at twice the price.
The biggest limitation isn’t power — it’s the duty cycle. 20% at 90 amps means 2 minutes of welding, 8 minutes of cooling. For auto body work where you’re doing dozens of short tack welds with cooling time between each one, it’s fine. For running continuous beads on a truck frame, it’s not. The 1-year warranty reflects the price point. Lincoln knows this is a disposable machine for most buyers, and that’s okay.
Pros
- Under $400 — the cheapest way into auto body welding
- Single-dial operation: no learning curve for beginners
- 15 pounds — light enough to hang from a workbench hook
- Runs on any standard 120V household outlet
- Lincoln build quality even at the budget end
- Thermal overload protection — won’t cook itself
- Uses standard 4-inch flux-core wire spools
- No gas bottle or regulator needed — just wire and metal
Cons
- Flux-core only — no MIG gas capability, no TIG, no stick
- 20% duty cycle at max output is restrictive
- 1-year warranty on a machine that may need replacing
6. Stark USA Spot Welder 1/8″ – Best Spot Welder for Auto Body
Best Spot Welder for Auto Body
Stark USA Spot Welder 1/8″
120V resistance spot welder with 6-inch throat depth. Welds up to 1/8-inch combined sheet steel thickness. The tool body shops use for factory-style panel replacement.
| Type: | Resistance Spot Welder | Voltage: | 120V, 60Hz |
| Throat Depth: | 6″ | Capacity: | 1/8″ Combined |
| Input Current: | 13.5A | Electrodes: | Replaceable |
| Weight: | 31 lbs | Warranty: | 1-Year |
Spot welders aren’t arc welders, and that’s the point. When you’re replacing a quarter panel on a modern car, the factory used spot welds. If you want the repair to look factory, you use a spot welder. The Stark is a 120V resistance spot welder with a 6-inch throat depth — enough reach for most panel flanges. It welds two sheets of clean mild steel up to 1/8-inch combined thickness.
Operation is dead simple. Clamp the tongs on both sides of the metal, squeeze the handle to set electrode pressure, then pull the trigger. The machine passes current through the electrodes, the resistance at the interface melts the metal, and you get a round fusion nugget about 1/4-inch in diameter. Release, move to the next spot, repeat. Factory spot welds are typically spaced every 1-2 inches along a flange. You’re replicating that pattern.
Surface prep matters more than with arc welding. The metal needs to be clean — no paint, no rust, no undercoating between the sheets. The electrodes need to make good contact on both sides. If there’s a gap between the panels, you’ll get sparking instead of a weld nugget. Hammer and dolly the panels tight before welding. The electrodes are replaceable and you’ll go through them if you’re doing a full quarter panel.
The 13.5-amp draw means it runs on a standard 120V/15A circuit, but barely. If your garage shares a circuit with lights or a compressor, you’ll trip breakers. Run it on a dedicated 20A circuit if you can. The duty cycle isn’t published, but in practice you get about 6-8 welds per minute before the transformer needs to cool. Let it rest every 20 welds or so.
This isn’t a production tool. It’s a homeowner/small-shop spot welder. For replacing one or two panels a year, it’s perfect. For a collision shop doing 10 cars a week, you want a pneumatic spot welder with water-cooled electrodes that costs 10 times as much. At 31 pounds it’s manageable. The 1-year warranty is what you’d expect at this price. If it dies after two years of occasional use, you got your money’s worth.
Pros
- Factory-style spot welds for authentic panel replacement
- 6-inch throat reaches most panel flanges
- Simple operation — clamp, squeeze, trigger, done
- 1/8-inch combined thickness handles most body panels
- Replaceable electrodes — consumable, not disposable machine
- Runs on standard 120V outlet (prefer 20A circuit)
- 31 pounds — manageable for a portable setup
- Costs less than paying a body shop for one panel job
Cons
- Surface prep is unforgiving — metal must be perfectly clean
- No published duty cycle — let it cool every 20 welds
- 1-year warranty — not built for production shop use
Car Panel Welding Tips
It is important to know that welding thinner materials, like in this case auto body, is much more different and more difficult than working on thicker ones like bridge girders or thick plates.
Read more on welding sheet metal
When fixing thick metal pieces we rarely have to worry about heat distortion and metal warping.

Thick materials resist distortion not only due to their bulk. They also have the tendency to act as their own heat sinks. Opposed to dealing with thicker materials, an auto body welder will need to have specific skills and knowledge on how to do it.
MIG Welding Tips for Car Panels
MIG (Metal Inert Gas) welding is the most commonly used type of auto body repairs.
The process of MIG welding involves continuously feeding the weld area with a wire (filler metal) along the weld seam. The wire carries current and is surrounded by an inert shielding gas at the weld. The inert gas from the gas bottle is constantly fed through the hose of the gun along with the wire. The most commonly used shielding gas for sheet-metal welding is C-25, 25% CO2 and 75% argon mixture.
In order to master the perfect MIG welding auto body, there are several things that you need to take into account.
Firstly, you need to make sure you have an accurate gas flow. You need to set it by using a regulator. The best range is 10 to 20 CFM combined with a .023- to .025-inch wire. Secondly, amperage settings are of critical importance.
Amperage is set by the wire feed speed and welding metal of different thickness requires a different feed speed. Finally, there are voltage settings to think about as well. Better MIG machines come with continuous voltage settings while the cheaper ones have step settings.
TIG Welding Tips for Car Panels
TIG (Tungsten Inert Gas) welding is probably the most skill-required type that we have.
However, even though it requires a lot of knowledge and understanding of complex terms, it can also be completed without any problems without so much technical understanding.
Basically speaking, a TIG welder will be able to perform a job well even without the specific technical knowledge needed.

Therefore, TIG welders are at the same time the most individualistic operators. Some prefer using air-cooled torches while others employ liquid-colled machines that may require a water supply. It is hard to debate which option is better. But there is no doubt that TIG welding provides the best results when used properly.
Spot Welding Tips
The spot is a welding process that has been used in the automotive industry since the 1930s. This process does not use flux nor filler. It is done by using a concentrated short circuit and by putting strong physical pressure on a small spot.
This is usually applied to as many as three thicknesses of body metal in order for it to be joined together.
Spot welds are actually easy and quick to make. Furthermore, they are really neat and strong.

As far as modern vehicles go, they depend on somewhere between 3,000 to 4,000 of spot welds to hold the surface together.
Even though this process is seen as the best welder for sheet metal, there are some shortcomings to it. For instance, it is considered prone to corrosion particularly in areas where it can attract moisture.
Oxy-Acetylene Welding Tips
This is an older type of method that is rarely used today. However, it still has its usage but mostly when it comes to electric welding.
Although it is mostly inferior to modern methods there are still situations when torch welding could prove to be useful.
Torch welding generates a lot of heat, about 6,300 degrees F, which also increases the probability of distortion or collateral damage that needs to be taken care of after the process is done.

Welders are advised to use electric techniques for sheetmetal work for those reasons. In order to complete the work by using the oxy-acetylene method, it would require a lot of skill, as opposed to MIG welding for instance, so it is not really favorable to use it.
Your Budget
Money can be a determining factor when getting your auto welder machine. If you are contemplating on getting a cheaper one, you should do so only if you have budget constraints. But if you want to think in the long run, investing in a quality unit from better welder manufacturers will make a whole lot of difference.
A lot of people opt for a short term solution and end up buying a low-priced, low-quality machine. Professional welders for auto restoration should invest in a quality unit. It makes much more difference as you can do a better job and it will last much longer.
You don’t really want to end up buying new welders in short time spans. Better invest in a good one that will work with your welding project in the long run.
Frequently Asked Questions (F.A.Q)
Will welding damage electronics?
If the welder is extremely careful there is no danger of damaging the electronics. However, just in case, the vehicle’s car battery should be disconnected before any actual work is done.
Is it safe to weld near a gas tank?
Welding near a gas tank is entirely possible! But there are certain precautions that one needs to think about first. Mainly, even though the gas tank is empty there are still fumes to think about which can easily ignite.
So working on a full gas tank is safer only if there are no leaks. Make sure to check the gas tank for damage because if there are any the gas can fuel the fire for a longer period of time. Employing caution and being extra careful is the best method to follow.
Can you weld exhaust on the car?
Of course, you can weld the exhaust on your automobile. But there are still some precautions that you need to take. Disconnecting the battery is one thing that needs to do in order to not shortcircuit it.
Additionally, you can put a work clamp on the end of the muffler to prevent the current from flowing in the exhaust system. If you take the necessary precautions it will be easy to do it.
What type of welder is used for body panels?
MIG welder is the best option for body panel jobs. It is the easiest one to use and also provides the best results. It is also used for making repairs on various types of materials as well as working with different thicknesses.
Additionally, a TIG welder could also be used but it requires added skill for working with the weld puddle and could prove to be a bit harder to master as opposed to the MIG welders.
How many amps does it take to weld a car panel?
In our opinion, it takes 1 amp per .001 inch of material thickness to make a really decent weld. Thus if you are working on something that is 3 mm thick it will require 110-120 amps.
What type of welding is used on cars?
Generally speaking, there isn’t a definitive welding process when it comes to autobody work. However, the most common type of auto body welders are Gas, Stik, MIG, and TIG.
However, a MIG welder is the most versatile one used as it works with a variety of materials as well as different thicknesses. If you have a quality machine you will be able to finish all kinds of necessary welding jobs.
Conclusion
As you were able to see auto body work is not so easy as you might think. It certainly takes skill and welding technique but the choices that welders need to make in terms of the unit that they plan to use are much more important.
Be sure to study everything about the machines that you are planning to use and also check out their duty cycles. Only then will you be able to ensure that you have a good piece of equipment for the specific job that you are planning to do. Also, don’t forget to follow all safety precautions that are required when welding.






