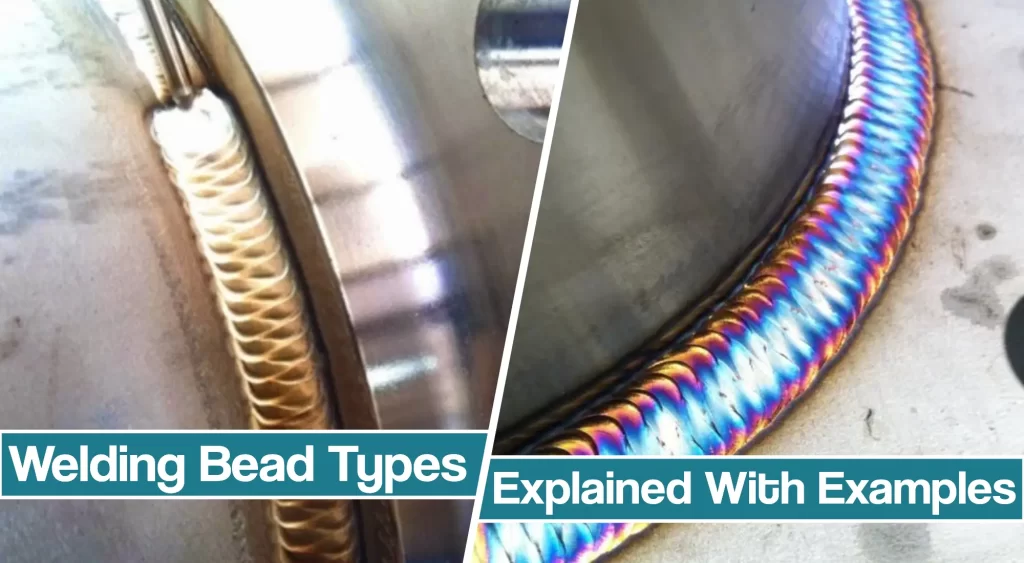
A weld bead is created by applying filler material to a joint between two pieces of metal. A deposit of filler metal from a single welding pass, also known as a welding bead.
Welding beads can look different, and the outcome varies on the selected process and various torch movements.
However, laying your first good-looking bead might be the most satisfying feeling as a beginner. Let’s explain the welding beads, how they form, and the most common welding bead patterns.
What are Welding beads, and how do they form?
A weld bead is a weld seam deposit formed in a single operation during a welding process.
You create welding beads by depositing a filler metal into a joint between two pieces of metal. Once the filler metal melts, your torch movement affects how the molten metal, or puddle, advances concerning the type of bead you create.
Keep in mind that a good weld is easy to spot. High-quality welds are straight and even, with no slag, cracks, or holes. It should not be too thin, and there should be no pits or craters in the bead patterns.
Weld bead appearance can vary by many different factors. The most crucial is, as you can deduce, torch movements. Even though the way you move the torch will most significantly impact the bead patterns, you shouldn’t disregard gravity, welding parameters, filler rod choice, or speed. These can affect how weld metal solidifies and look in the end.
Different Types of welding beads
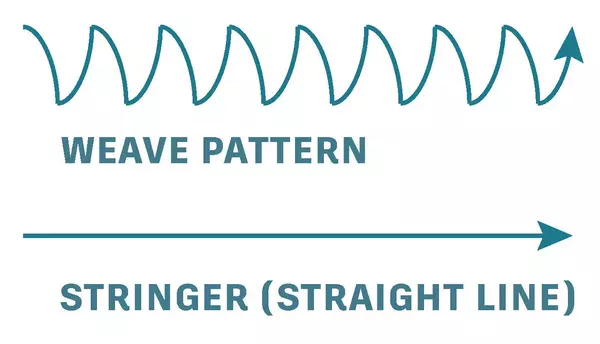
When it comes to laying welding beads, you can use different torch movements and techniques to get different results. Generally speaking, there are two main welding bead techniques and patterns:
- stringer beads
- weave beads
However, once you decide to create weld beads, there are different variations of the weave pattern which look different and differ from the straight weld.
Stringer Weld Bead
A stringer bead is easily achieved by either pulling or pushing your torch across the weld joint, with little to no side-to-side movement. As a rule of thumb, the drag or pull gun technique will give you a bit more penetration and a narrower bead. A push gun technique will provide you with a bit less penetration and a wider bead.
So if you are welding thicker materials, you should opt for the drag technique, where you angle your electrode and move the stringer bead forward in the direction of your weld. It will result in a robust-looking weld, but you can be sure it will last.
Meanwhile, you should push the torch away from the puddle when dealing with thinner materials. That way, you will prevent burn-thorough, and you can also push the torch when welding vertically, where gravity naturally pulls it down.
Stringer beads are also used in hardfacing. For example, this is a surfacing operation that helps extend the life of scoops, fenders, plows, and other exterior metal parts.
Wave Bead Patterns
As the name suggests, the weave bead involves moving the torch in a criss-cross or woven pattern. Weave pattern beads are beneficial when you’ve got a broader joint to weld, as they will result in a nice wide bead.
The weaving technique is about more than just moving up and down. For example, you can use the approach to control the heat around the weld puddle. You can also pause slightly to ensure a good tie-in and prevent defects such as undercutting.
Like with sewing, there are different variations of a wave bead pattern. They can differ as you move the torch affecting the appearance and characteristics of the bead. Let’s look at some common variations.
Convex Weave Bead
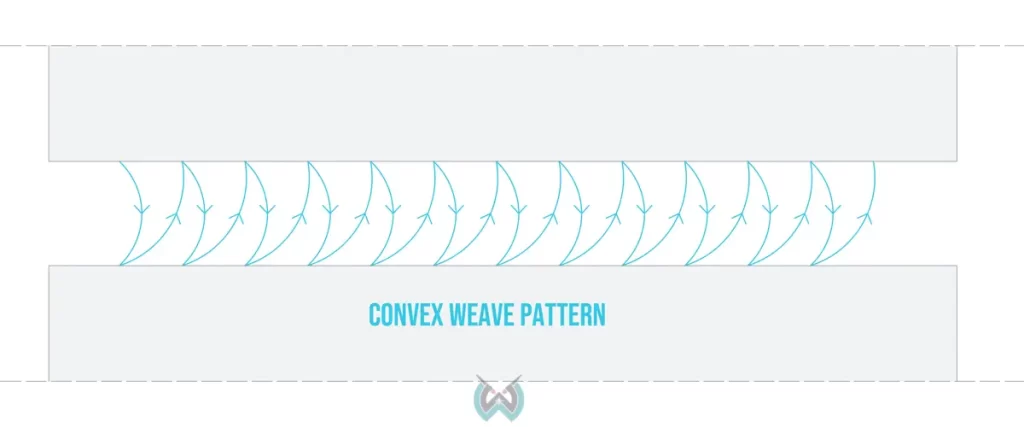
A convex weave bead is created by moving the torch side to side perpendicularly to the direction of the weld joint and direction of travel. The bead should be slightly curved like a shark fin or the tooth of a circular saw blade.
The convex weave pattern is beneficial when dealing with a broader bead. To avoid creating a bulge in the middle of the bead, you will want to move the torch a bit quicker than regular.
Concave Weave Bead
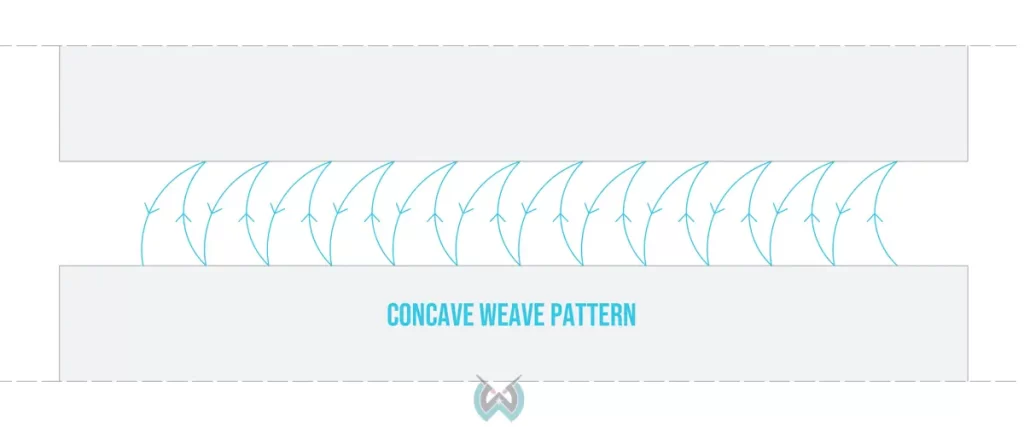
A concave weave is very similar to a convex weave bead, but the most significant difference is the inverse of the convex weave pattern and the round edge which face away from the travel direction of the torch.
This pattern is used when filling wider beads, just like convex beads, and you will also need to avoid creating a high crown. Due to characteristics and appearance, a concave pattern is often used alongside a pushing torch movement.
Circular Weave Bead
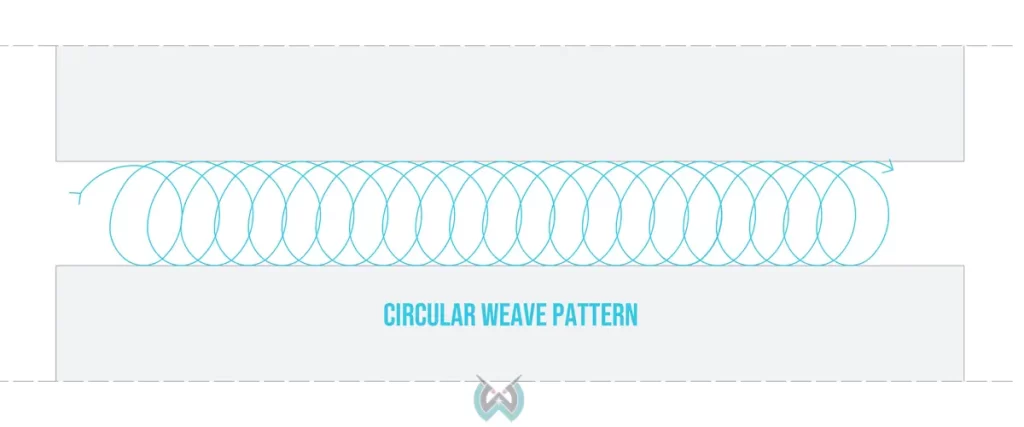
The circular weave essentially combines characteristics of the concave and convex bead patterns.
Practicing this pattern includes drawing a series of ovals with the torch. However, you should be careful when you need to weld vertically, as it will get the puddle quite wide and hot, resulting in drips.
ZIGZAG Weave Bead
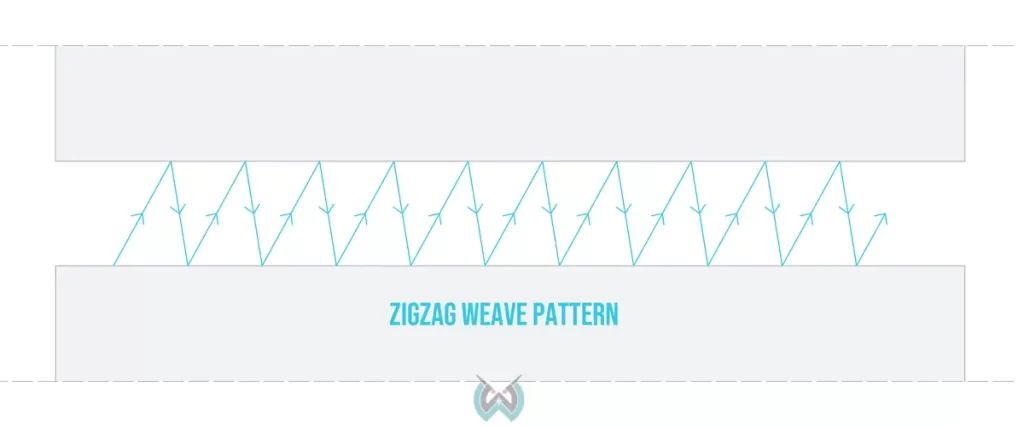
The zig-zag welding weave pattern is very simple to master. It includes moving the torch diagonally in two directions. The first movement should have a steeper angle, while the retracting movement should have slightly lower angle.
Triangle Weave Bead
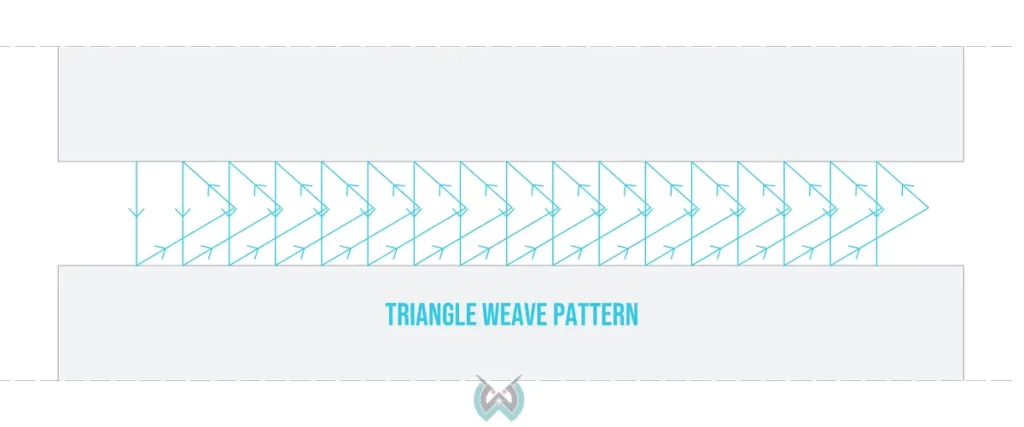
As the name suggests, the triangle weave is created by drawing a series of connected triangles with the torch. Keep in mind that the point of the triangle should be directed toward the direction of the torch movement.
A triangle weave is especially useful when you need to weld vertically upward, as it helps avoid molten metal falling onto the floor due to gravitation.
Straight Stepped Weave Bead
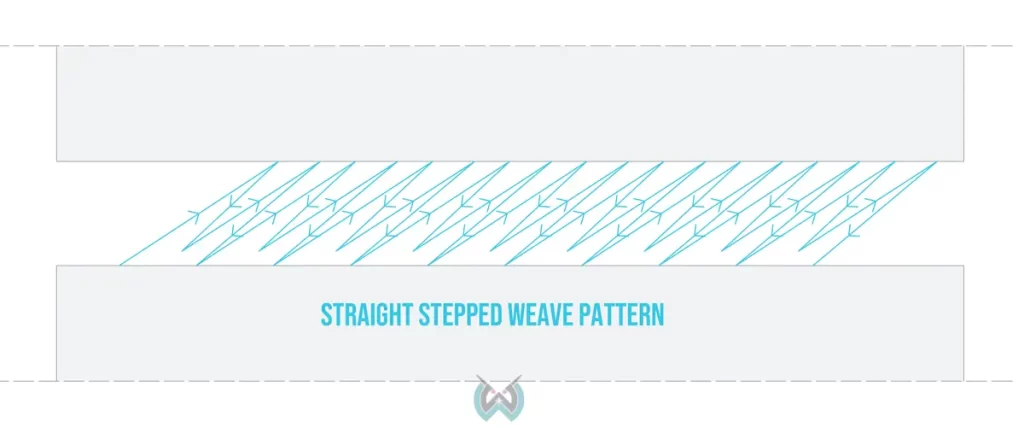
Straight-stepped weave beads are applied when making multi-pass welds, but they can also be used when welding a root pass. If you use the straight stepped welding bead in the first pass of a joint with a root opening, be careful not to lose the puddle. If you make too steep of an angle, the retracting movement and it’s melted metal may not be able to stay solidified enough not to fall through the root opening.
Ladder Wave Bead
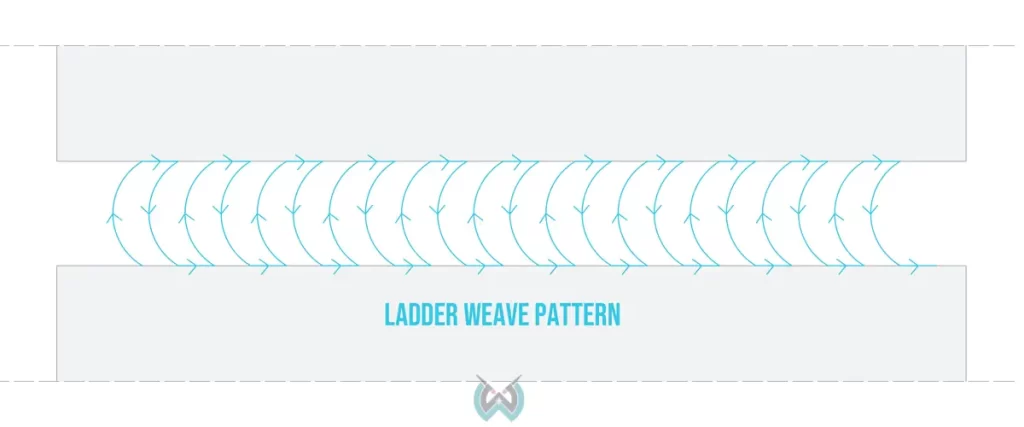
The ladder weave bead is a series of rectangles, essentially looking like a ladder, and made by moving the torch. The upward and downward strokes should be slightly curved. At the top and bottom of those strokes, the torch’s movement creates the shorter ends of the rectangle.
Jagged Weave Bead
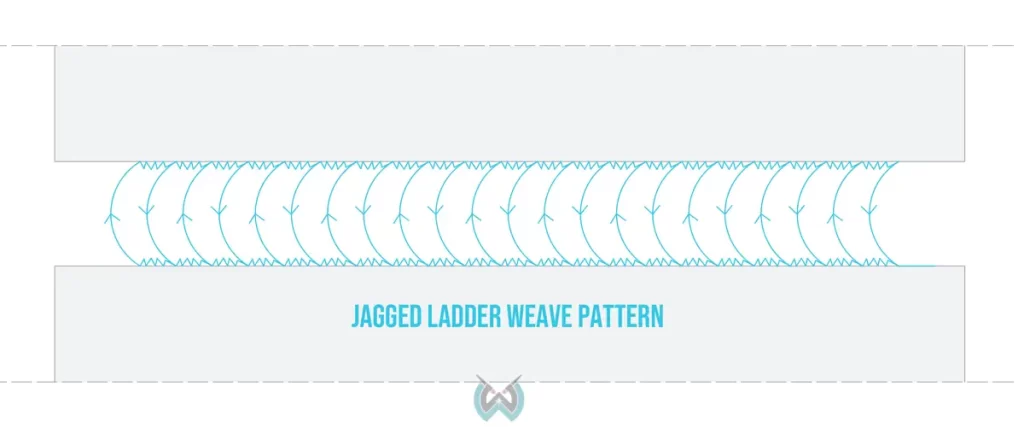
The jagged weave bead is very similar to the ladder weave bead. However, the big difference appears at the smaller ends of the rectangle, where jagged ends look like the teeth on a hacksaw blade. This pattern provides a solid tie-in on the edges of the joint.
As we mentioned at the start, welding beads can be different when using various welding techniques. So let’s look at the differences.
“8 Figure” Weave Bead
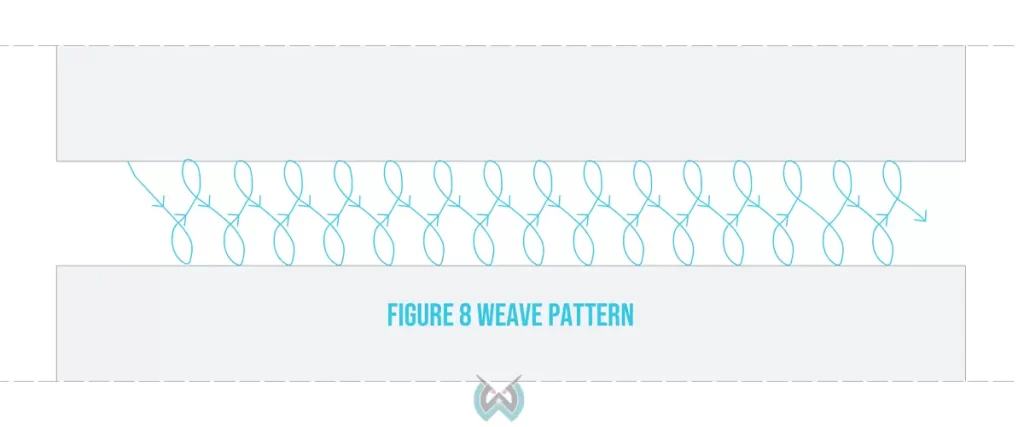
Making a number eight weave pattern seems like one of the easiest welding beads to master. After all, you wrote this number with your hand thousands of times in your life on paper. So, you should be able to repeat the movement with your eyes closed. Right?
Well, not exactly. This is the “famous” movement only the best welders can perform. If you approach the welding firm, knock on their door, and without much talk whip out the MMA welder and a steel plate and perform perfect “eights,” they’ll already be preparing the paperwork to hire you.
These beads are also referred to as oscillation beads, and they increase accuracy of welding bead and weld quality overall.
MIG Welding Bead
MIG welding is one of the most straightforward processes to master, and many new welders choose to lay their first bead patterns using this method.
One of the most significant advantages is that there are many techniques to create a good weld.
However, the endless debate on the internet is the push or pull technique. Some consider pushing produces stronger welds, while certain welders think quite the opposite.
Since hardwire MIG does not require flux coating, you don’t need to draw their puddle, as there is no fear of contamination.
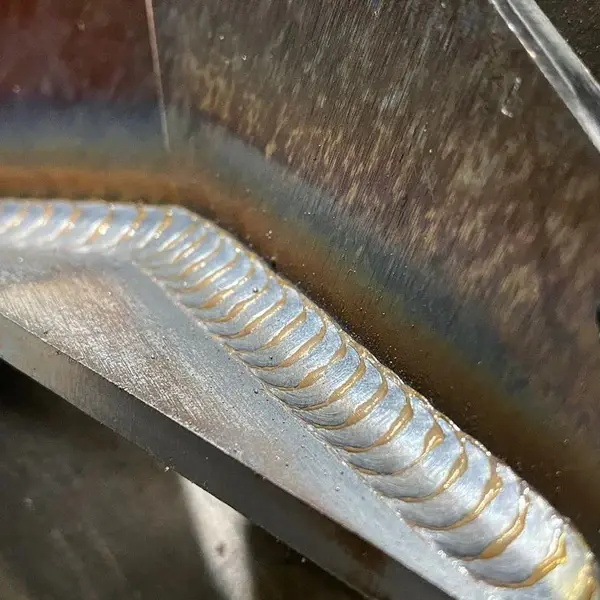
When it comes to laying an actual bead, hardwire MIG welders make it easy to lay a nice and straight stringer bead. However, if you’re dealing with a vertical joint or a wide horizontal weld, it may be more beneficial to lay a weave pattern bead instead of a stringer.
In certain situations, when applied to proper MIG settings, MIG beads can also get that stacked dime aesthetic look. Even though they are not as strong as regular weld joints or straight beads, they leave clean looking weld impression.
TIG Welding Bead
GTAW welding might be harder to perform and master, but the TIG welds are among the most beautiful in the industry. Besides cleanliness, TIG welding is often used when aesthetics are required, and the most common appearance you might have noticed is the stacked dime.
Weld beads are formed once you evenly add the filler rod with the other hand as the TIG arc moves with the main hand. Each piece of molten metal drips looks like a dime, and as you move forward, they stack on top of each other. For example, the faster you travel, the dimes are stacked closer, but you don’t want to overdo it.
Another TIG welding technique you might have heard of as a beginner is walking the cup. This technique is primarily used for pipe welding, but there are a few other applications where being able to walk the cup can make for a better-looking weld.
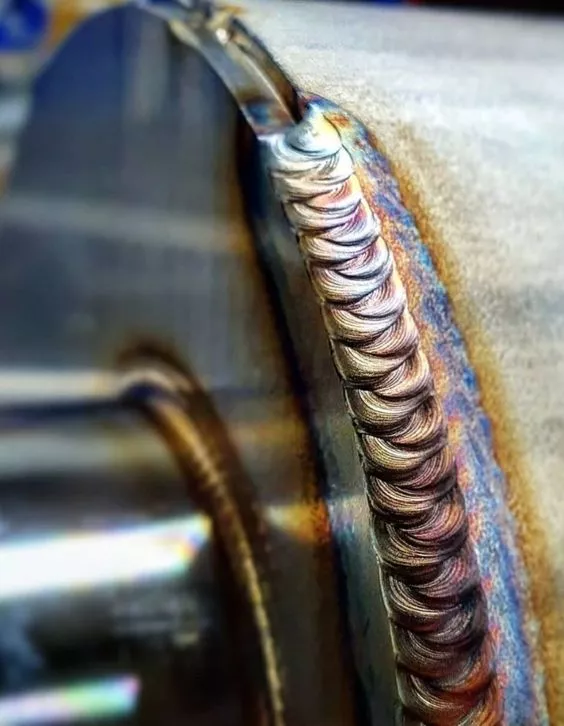
In this approach, the filler wire rests on the part to be welded as the welder moves the TIG torch cup back and forth as it moves forward in his weld. The cup can be rested inside a groove or the two sides of a T joint, on the outside of a pipe, or on a flat surface. The weave pattern of walking the cup looks impressive, and the weld bead seems like you are putting on scales on a proper TIG weld.
Stick Welding Beads
The filler rods used when Stick welding can be pretty versatile and produce different welding bead patterns depending on the technique used.
Therefore, we are talking about different weld puddle results with welding rods.
When welding metal horizontally on a flat surface, it’s easy to drag the separate filler rod to lay a stringer bead.
This technique results in a flat bead that is relatively straight and narrow.
If you are stick welding something with a vertical joint, with the stick electrode, you can easily lay a weave pattern bead using the right-hand technique.
You need to adjust your stick welder properly and choose adequate electrodes.
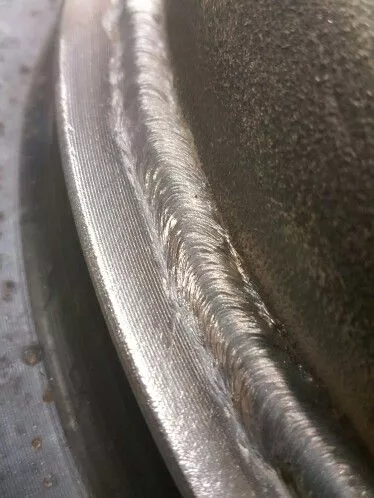
Flux-coated Welding Techniques
When flux core welding, you can lay a lot of mechanically fed wire into the weld joint relatively quickly. Most of the time, welders use stringer beads to create a solid weld, which is pretty common to MIG.
But, just like with hardwire welding, when you vertically weld something, you may want to opt for a weave bead pattern instead. This way, you avoid drips that can occur once the puddle gets too hot.
Resources:
- https://www.engineeringchoice.com/welding-bead/
- https://www.esabna.com/euweb/mig_handbook/592mig7_13.htm
- https://www.esabna.com/euweb/mig_handbook/592mig7_13.htm
- https://industriesdays.com/welding/what-is-a-bead-in-welding/
- https://www.weldingtipsandtricks.com/walking-the-cup.html
- https://forum.millerwelds.com/forum/welding-discussions/5067-mig-weld-beads


